

You can submit a support request at support@studystash.com.
Step 1: University provides StudyStash with Identity Provider (IdP) information
Fill out the following form to provide details to our team: https://internal.support.studystash.com/servicedesk/customer/portal/34/create/158 Alternatively you can contact us at support@studystash.com with this information if you would prefer.Step 2: StudyStash provides Service Provider (SP) information
Once we have received the form above our team will be able to provide you with a URL containing our Service Provider metadata document (XML). StudyStash will provide:Reply URL (Assertion Consumer Service URL) | To be provided by StudyStash after completion of SSO Configuration form |
Identifier (Entity ID) | To be provided by StudyStash after completion of SSO Configuration form |
Required NameId policy: |
|
Required Attributes: | Email Address
|
Optional Attributes: | First name
Last name
|
App Federation Metadata Url | To be provided to StudyStash |
Example: Azure Active Directory
The following steps are required to set up StudyStash as a service provider with Azure Active Directory (also known as Microsoft Entra ID):3.1) Create a new Enterprise Application
- Navigate to the Microsoft Azure portal and sign in as a user with permissions to create enterprise applications.
- Under the Azure Services section, find and select Enterprise applications. You may have to go to the All services page and then scroll down to the Identity section to find it.
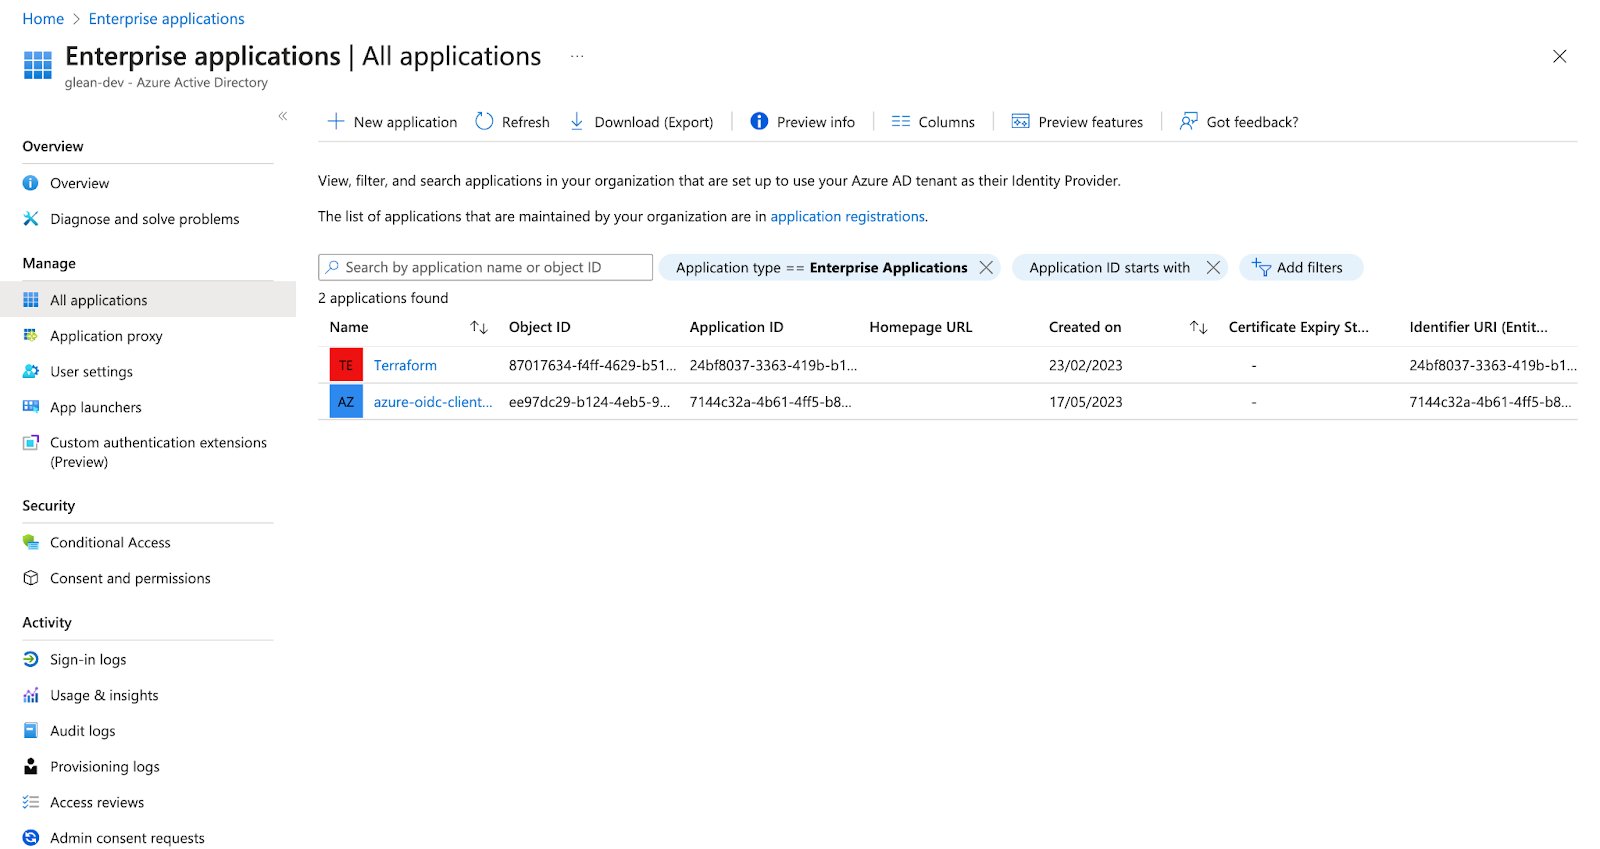
Figure 1. SSO Setup Guide — screenshot
- Select New application. You’ll be redirected to the Browse Microsoft Entra Gallery page.
- Select Create your own application.
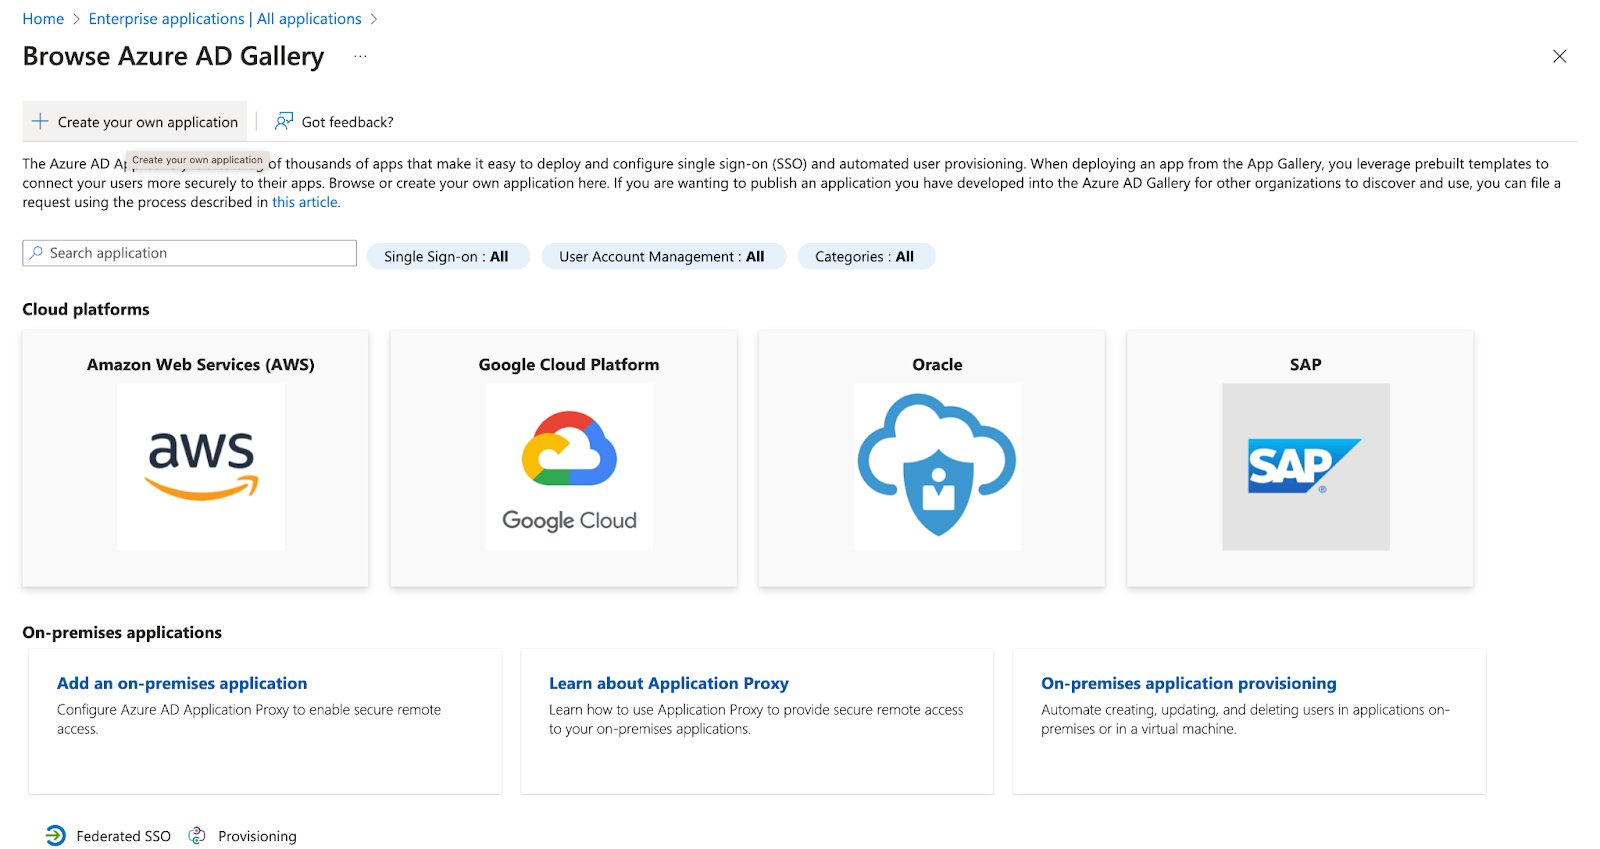
Figure 2. SSO Setup Guide — screenshot
-
In the popup that opens:
- Provide a name of the application (StudyStash).
- Select “Integrate any other application you don’t find in the gallery (Non-gallery)”.
- Click “Create”.
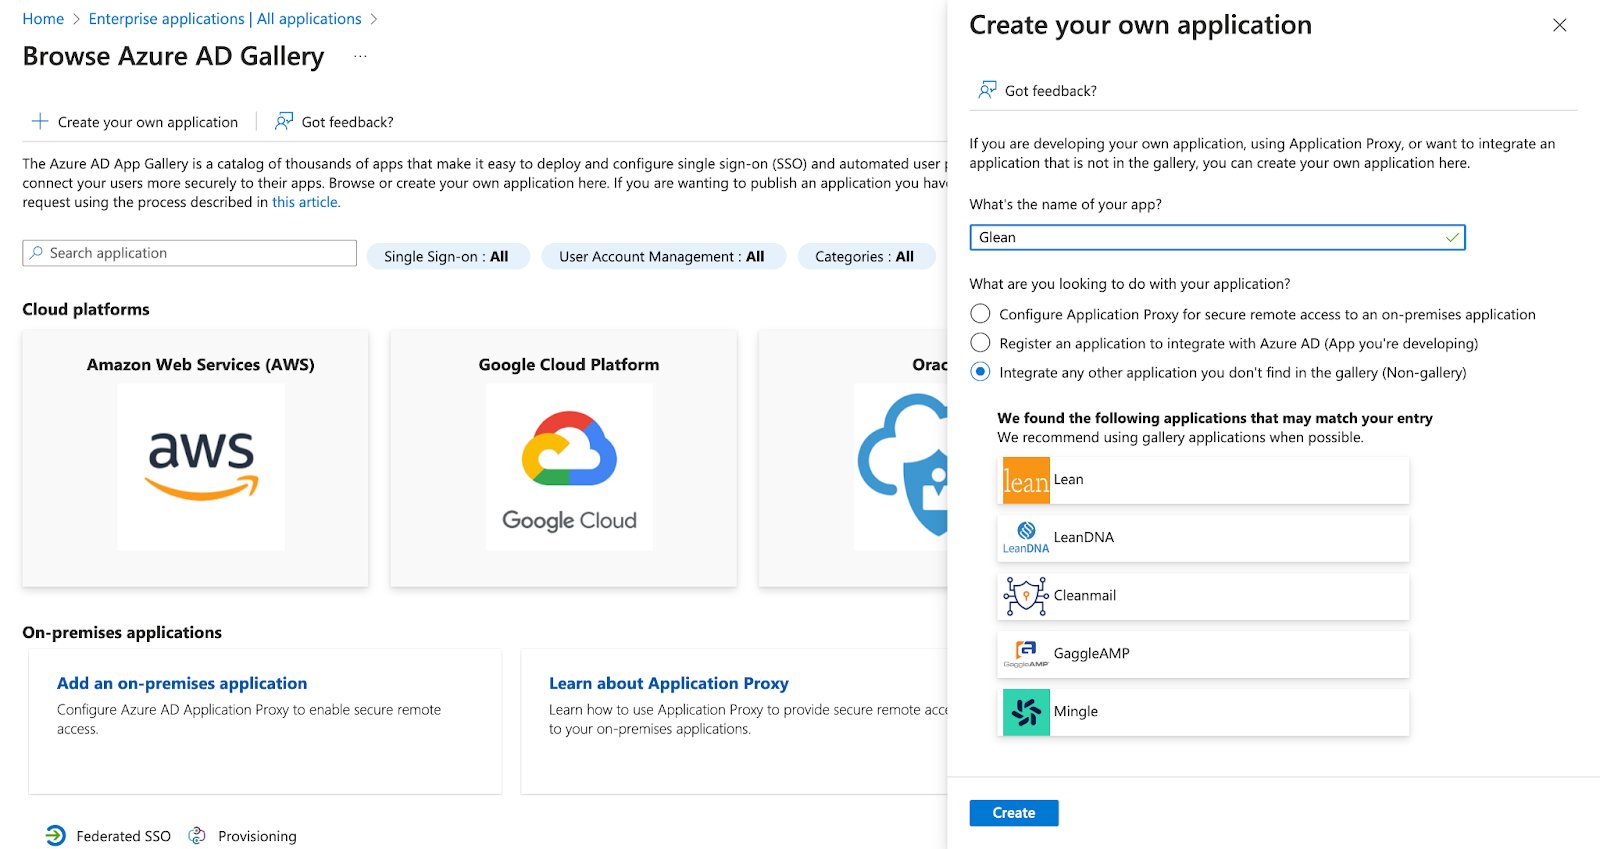
Figure 3. SSO Setup Guide — screenshot
3.2) Assign users or groups
Now the enterprise app is created, you need to assign users or groups before they can use it to log in. More details are provided from Microsoft: https://learn.microsoft.com/en-us/entra/identity/enterprise-apps/assign-user-or-group-access-portal?pivots=portal3.3) Set Basic SAML Configuration
- Select the Single sign-on option in the Manage menu and choose SAML. You’ll be redirected to the Set up Single Sign-On with SAML page.
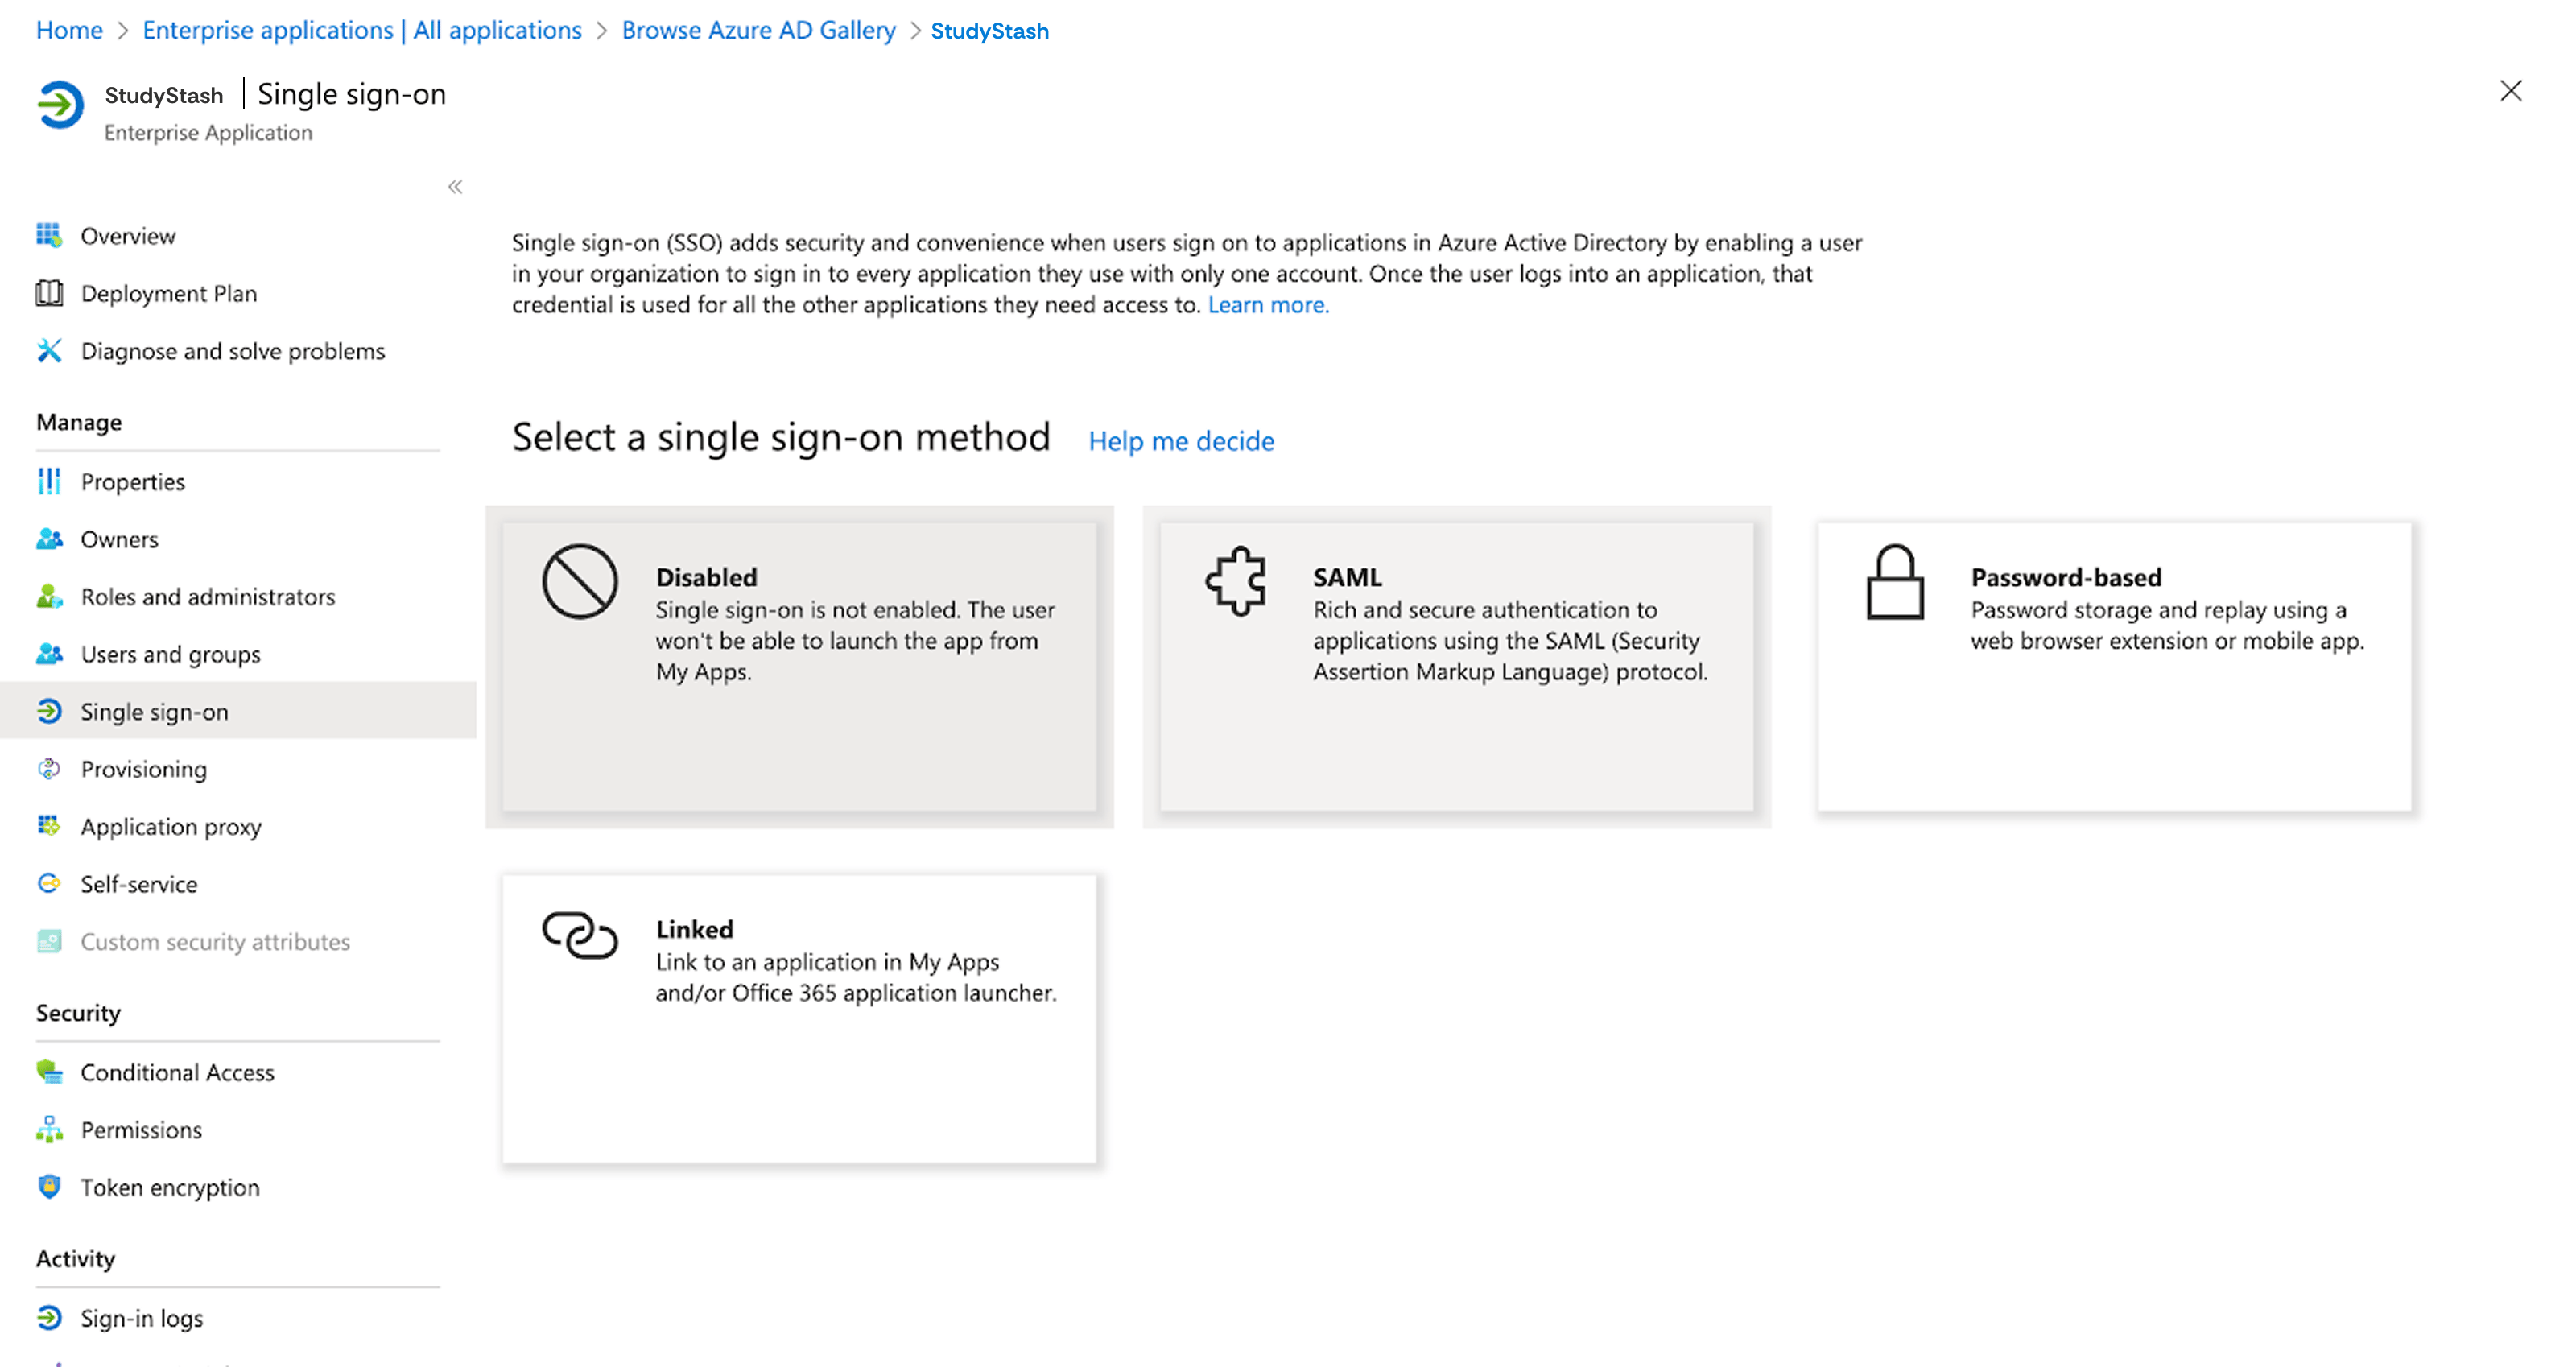
Figure 4. SSO Setup Guide — screenshot 4
- Find the Basic SAML Configuration section.
- Select Edit. The Basic SAML Configuration panel will open.
- Add the provided Identifier (Entity ID) and Reply URL (Assertion Consumer Service URL) values. These values will be saved automatically.
Field | Value |
|---|---|
Reply URL (Assertion Consumer Service URL) | |
Identifier (Entity ID) |
- Select Save at the top of the panel. Close the panel.
3.4) Verify correct configuration of attributes and claims
- Still on the Set up Single Sign-On with SAML page, find the Attributes & Claims section.
- Select Edit.
- Verify the following attributes and values are present:
Required Attributes: | Email Address
|
Optional Attributes: | First name
Last name
|
3.5) Share the application’s metadata URL
- Still on the Set up Single Sign-On with SAML page, find the SAML Certificates section.
- Copy the App Federation Metadata Url, and send this to your StudyStash contact. This is the final piece of information we need to enable SAML.
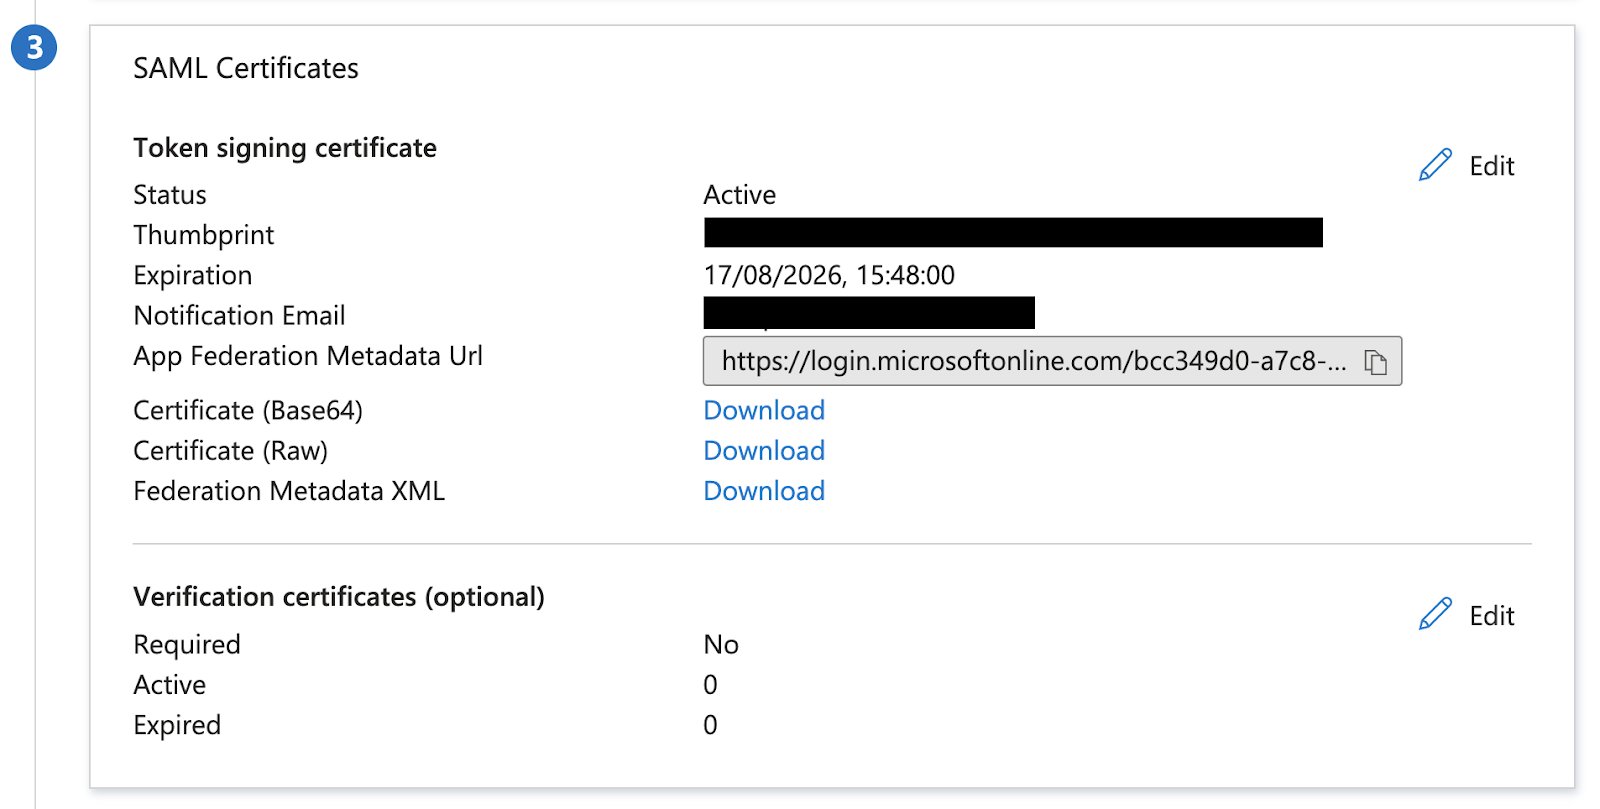
Figure 5. SSO Setup Guide — screenshot
- The setup is now complete!