

Prerequisites
You must have D2L Brightspace administrative access with the ability to manage LTI Advantage tools via Manage Extensibility.Step 1: Register StudyStash as an External Tool in Brightspace
- Log in to D2L Brightspace with an administrator account
- Click the Settings cog in the top right corner and select Manage Extensibility
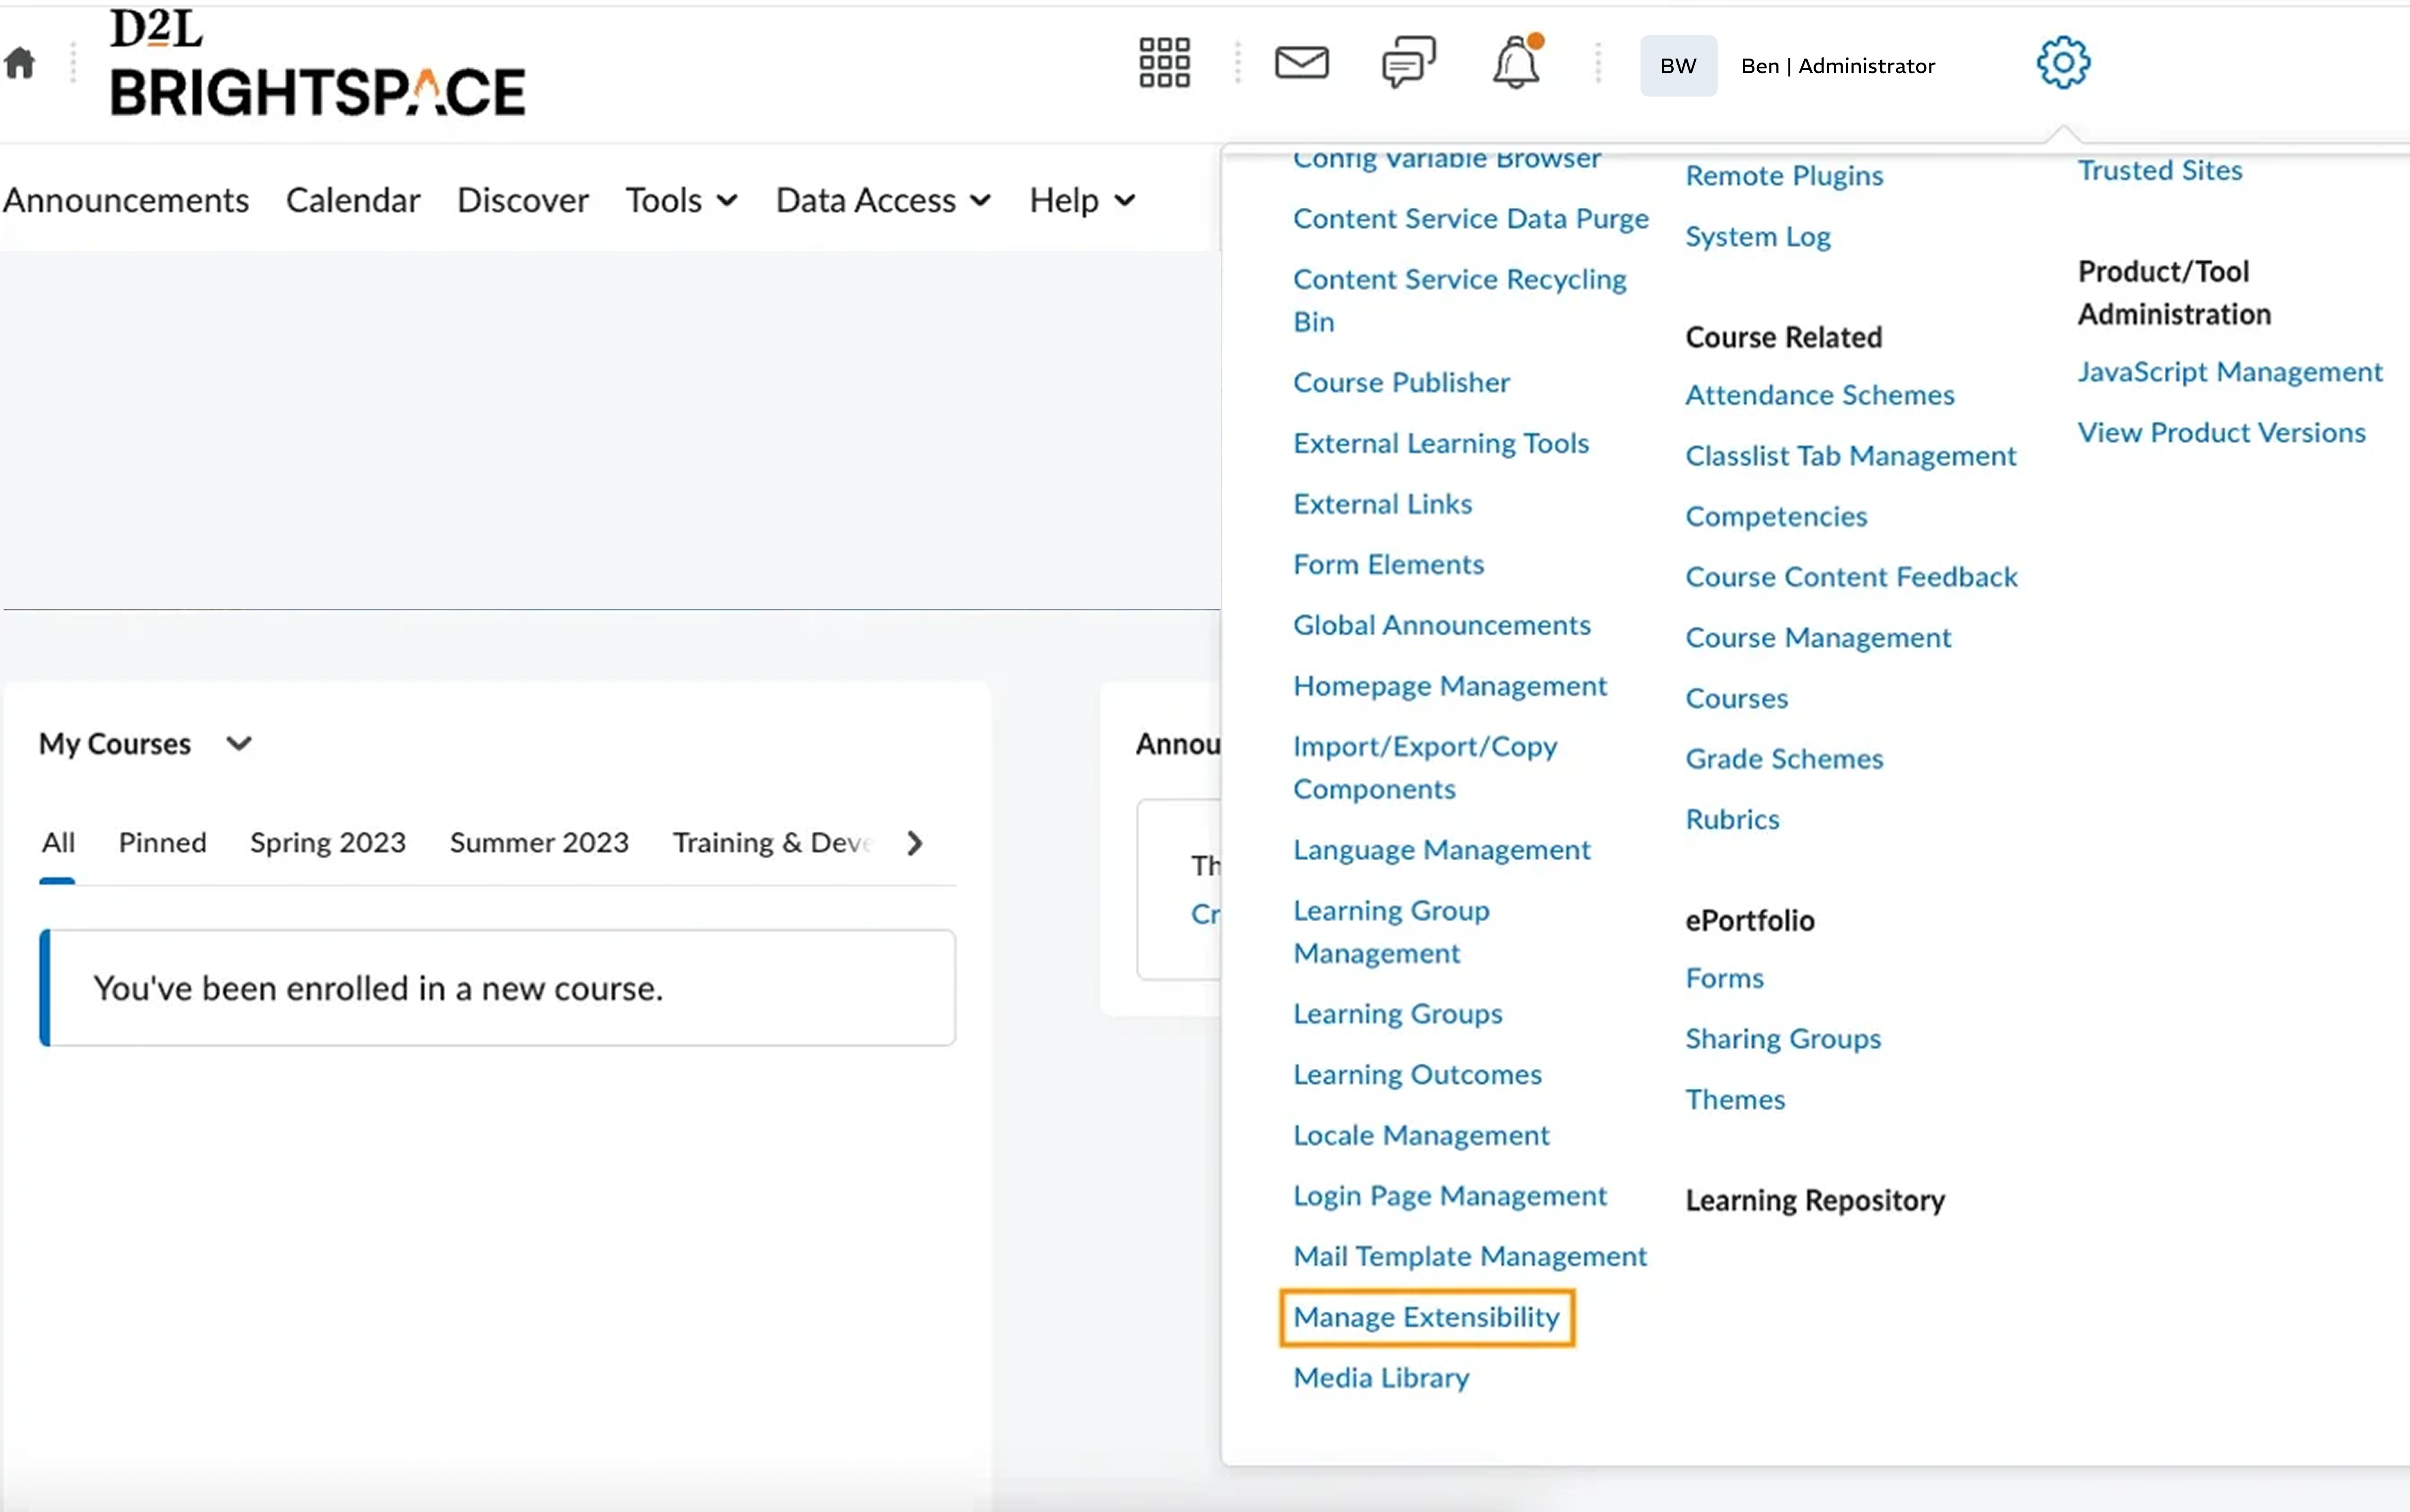
Figure 1. Step
- Click the LTI Advantage tab
- Click Register Tool and select Standard Registration
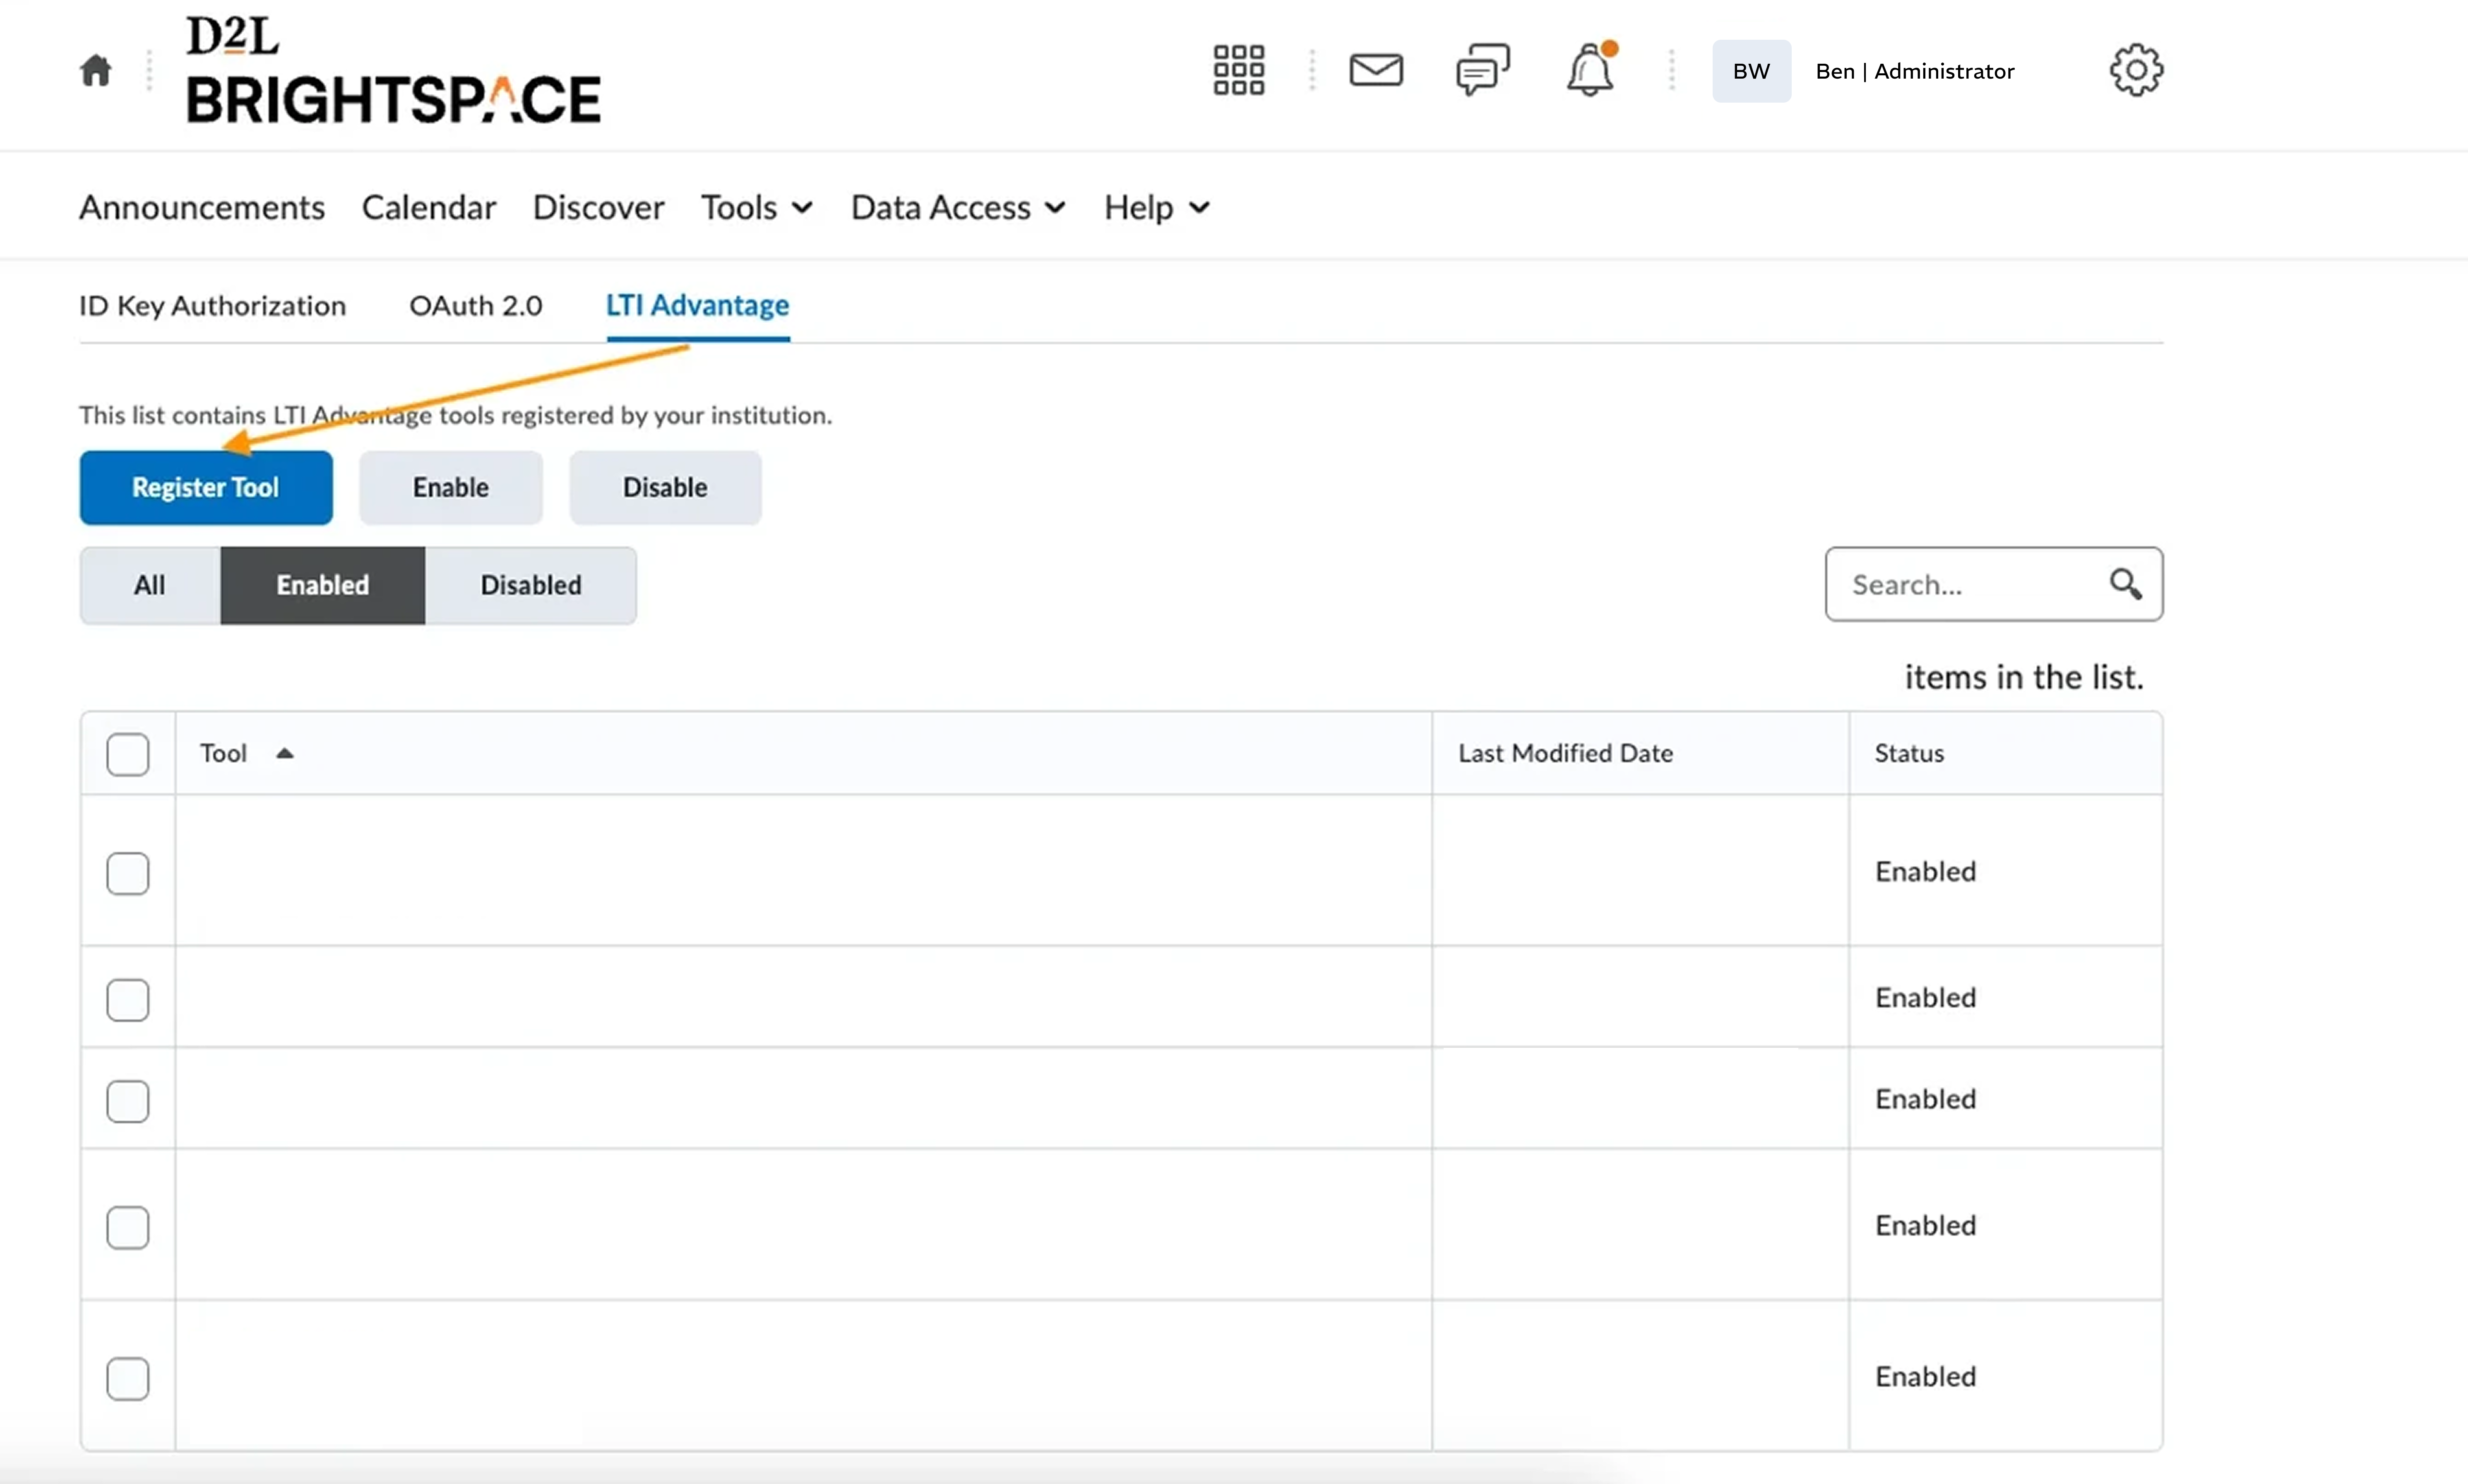
Figure 2. D2L Brightspace Integration Guide (LTI) — screenshot 2
- Complete the fields using the information in the table below:
Field | Value |
|---|---|
Tool | Standard |
Enabled | On |
Name | StudyStash |
Domain | |
Redirect URL | |
OpenID Connect Login URL | |
Target Link URI | |
Keyset URL |
-
Under Extensions, enable the following:
- Names and Role Provisioning Services (✅)
-
Under Security Settings, enable:
- Org unit information (✅)
- User information (✅)
- Link information (✅)
- Click Register
- You will receive a Client ID - copy and save this securely
Step 2: Create a Deployment
- From the confirmation modal, click View Deployments
- Click New Deployment
- Complete the fields using the information in the table below:
Field | Value |
|---|---|
Tool | StudyStash |
Name | StudyStash |
Description | Safe, AI-Powered Learning, all within your LMS |
-
Under Security Settings, enable:
- Org unit information (✅)
- User information (✅)
- Link information (✅)
- Click Add Org Units to select the departments or courses you wish to deploy StudyStash to
- Click Create Deployment
- Take note of the Deployment ID - you will need this in Step 4
Step 3: Add a Link
- From the Deployment page, click View Links
- Click New Link
- Complete the fields using the information in the table below:
Field | Value |
|---|---|
Name | StudyStash |
URL | |
Type | Basic Launch |
- Click Save and Close
Step 4: Provide Deployment Details to StudyStash
Before you can deploy to end-users, StudyStash requires the following details to enable the LTI integration.Field |
|---|
Client ID |
Deployment URL |
Deployment ID |