

Purpose
StudyStash Course Sync (Opt-In) is a Moodle local plugin that helps administrators roll out the StudyStash LTI activity across courses at scale. Admins select and “opt-in” courses using a CSV file and preview the result using a dry run before making live changes. Instead of enabling StudyStash manually in each course, the plugin queues a sync task that checks every eligible course and adds the StudyStash activity only where it is missing. It is safe to run multiple times: courses that already contain the configured StudyStash activity are skipped, and only new or missing courses are updated.Action | Explanation |
|---|---|
Dry Run | Previews which courses would get StudyStash based on which have been opted-in. |
Sync StudyStash to Courses | Enables StudyStash in eligible courses that do not already have it. |
Course opt-ins | Lets admins choose courses that must include the StudyStash activity. |
Prerequisites
-
Moodle version must be
>= 2022041900(Moodle 4.0+) -
Administrative access (
moodle/site:config) to your Moodle Instance - A valid preconfigured LTI tool for StudyStash already exists
- Cron running within Moodle
- Your Customer Success Manager has provided the Plugin via a ZIP file
Step 1: Installing the plugin
-
Go to
https://<your-moodle-instance>/admin/tool/installaddon/index.php - Upload the ZIP file provided to you by StudyStash by pressing “Choose a file…”
- Press “Show more…”
- Set the “Plugin type” to be “Local plugin (local)”
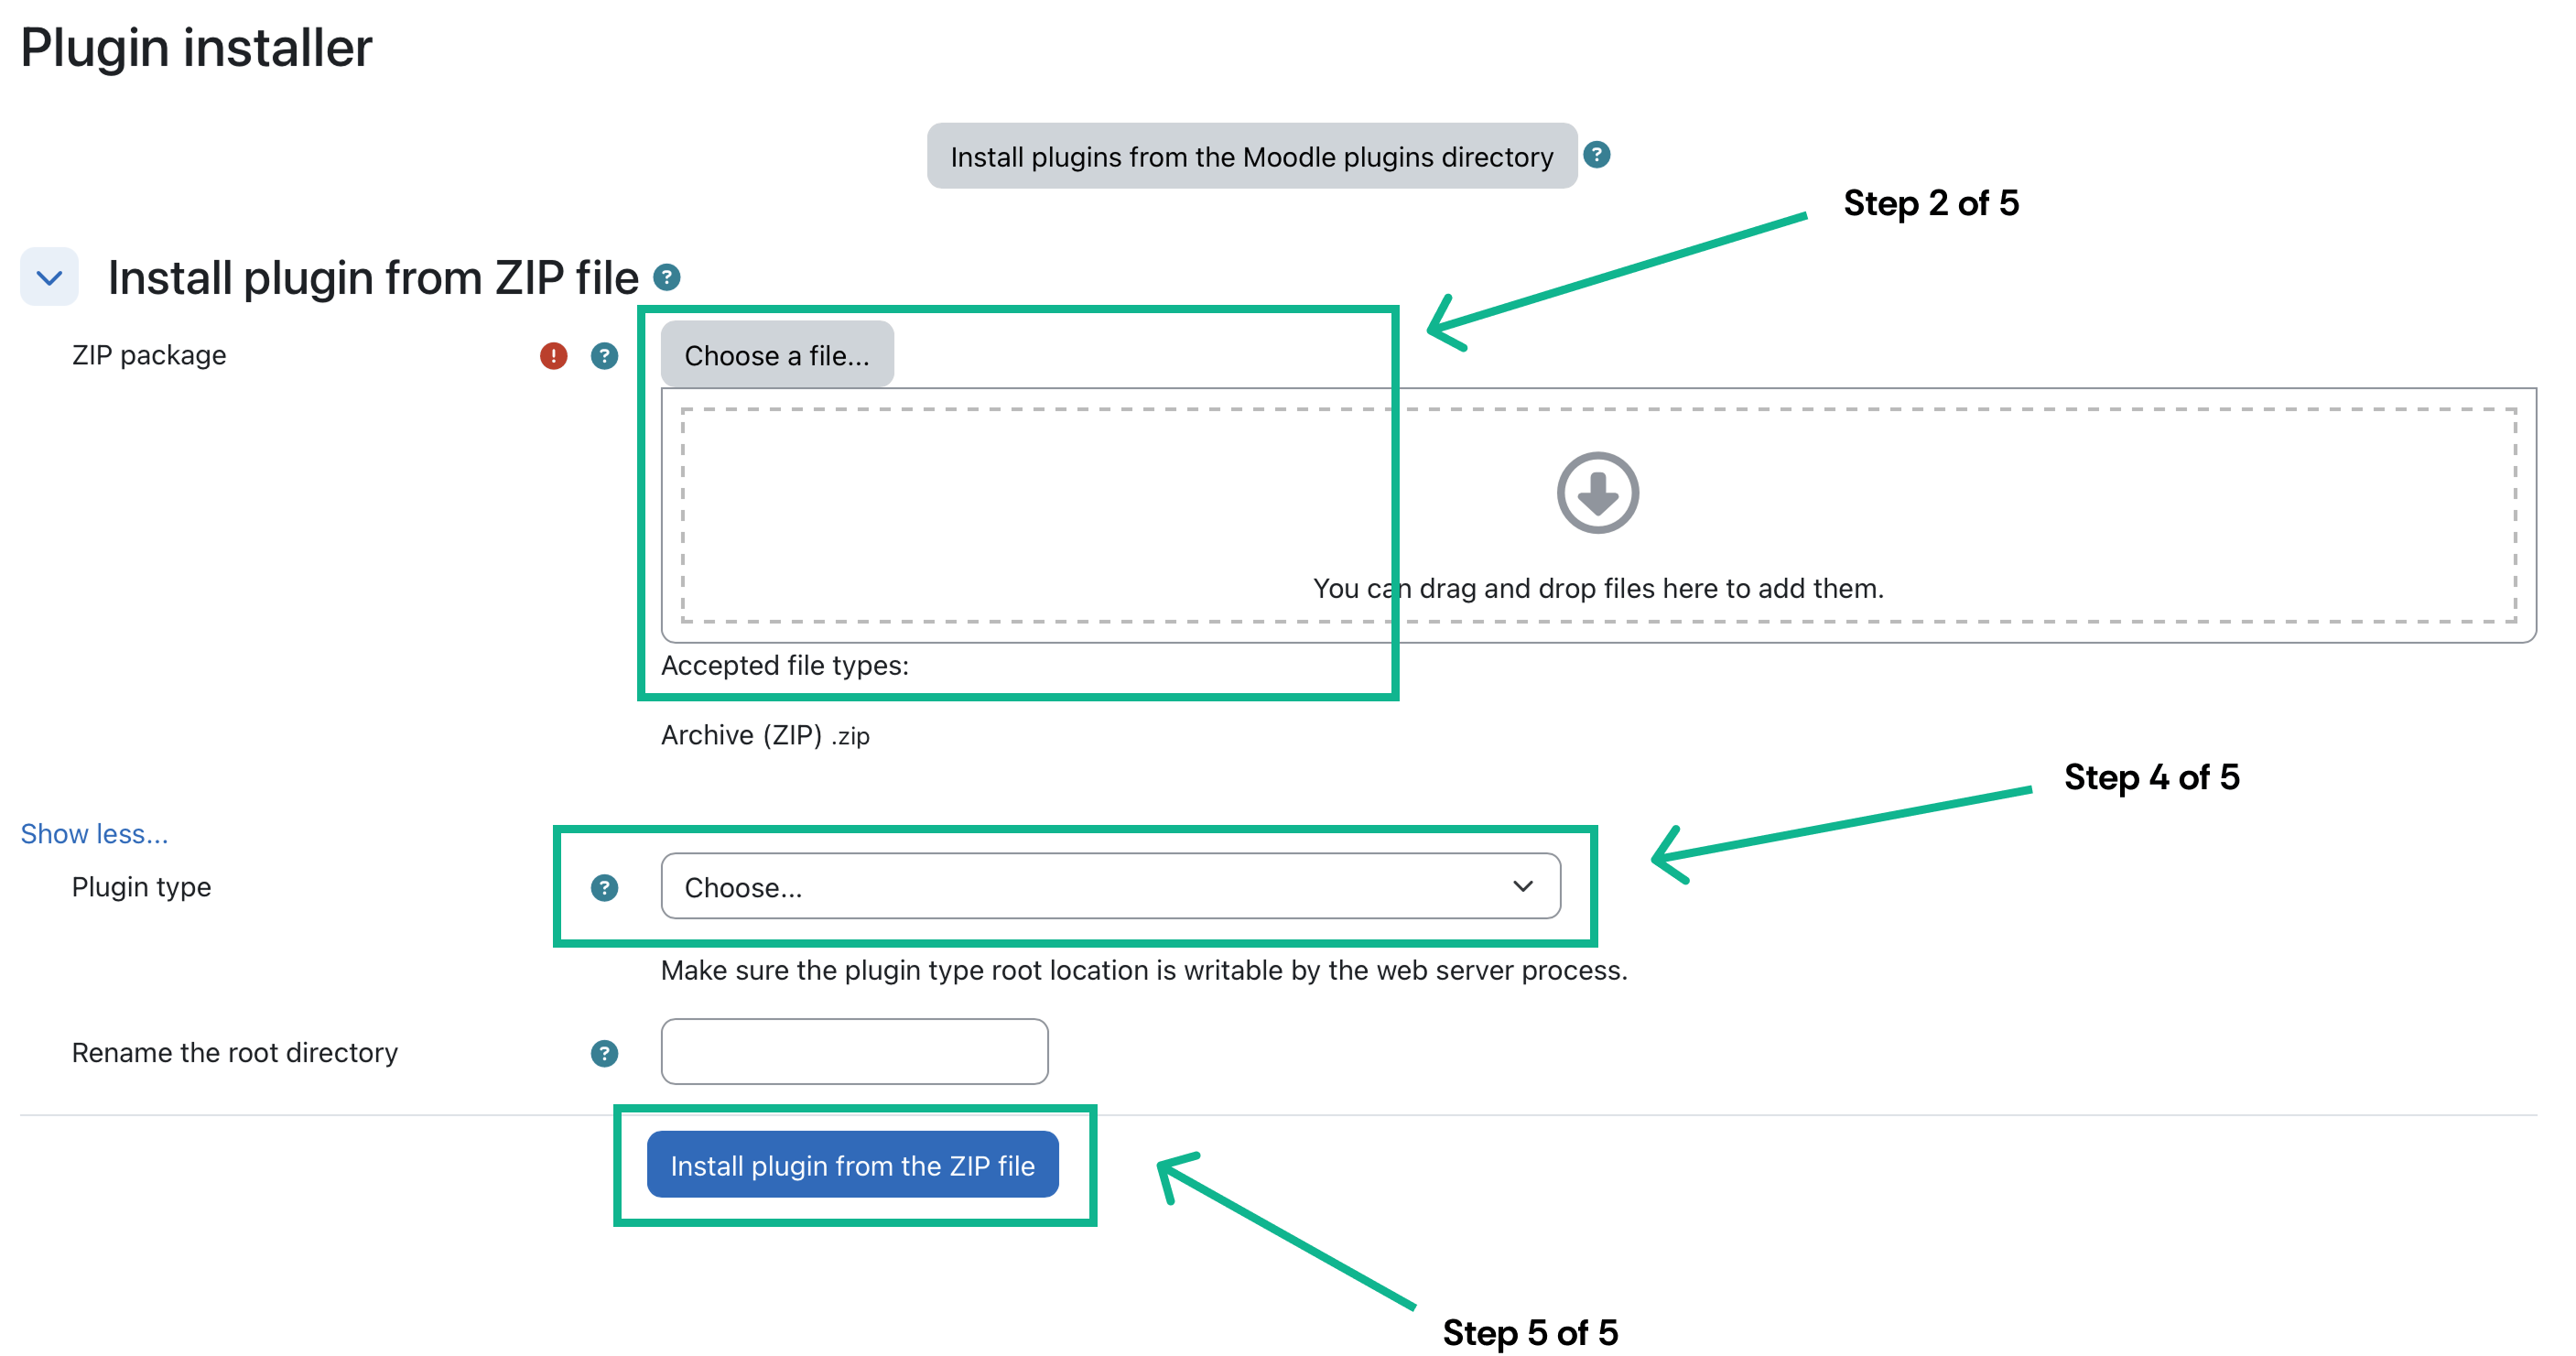
Figure 1. Moodle Plugin: Syncing StudyStash to Courses (Opt-In Mode) — screenshot 1
- Press “Install plugin from the ZIP file”
- After the validation message, press “Continue”
- After the server checks message, press “Continue”
-
After the plugins check message, press “Upgrade Moodle database now”
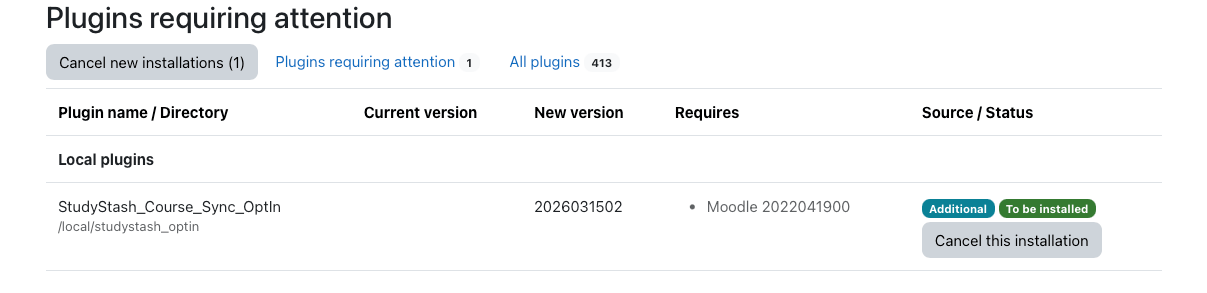
Figure 2. Moodle Plugin: Syncing StudyStash to Courses (Opt-In Mode) — screenshot
- If an “Upgrading to new version” message appears, press “Continue”
Step 2: Configuring the plugin
After installing the plugin (step 1), you will be required to configure the new settings that are available.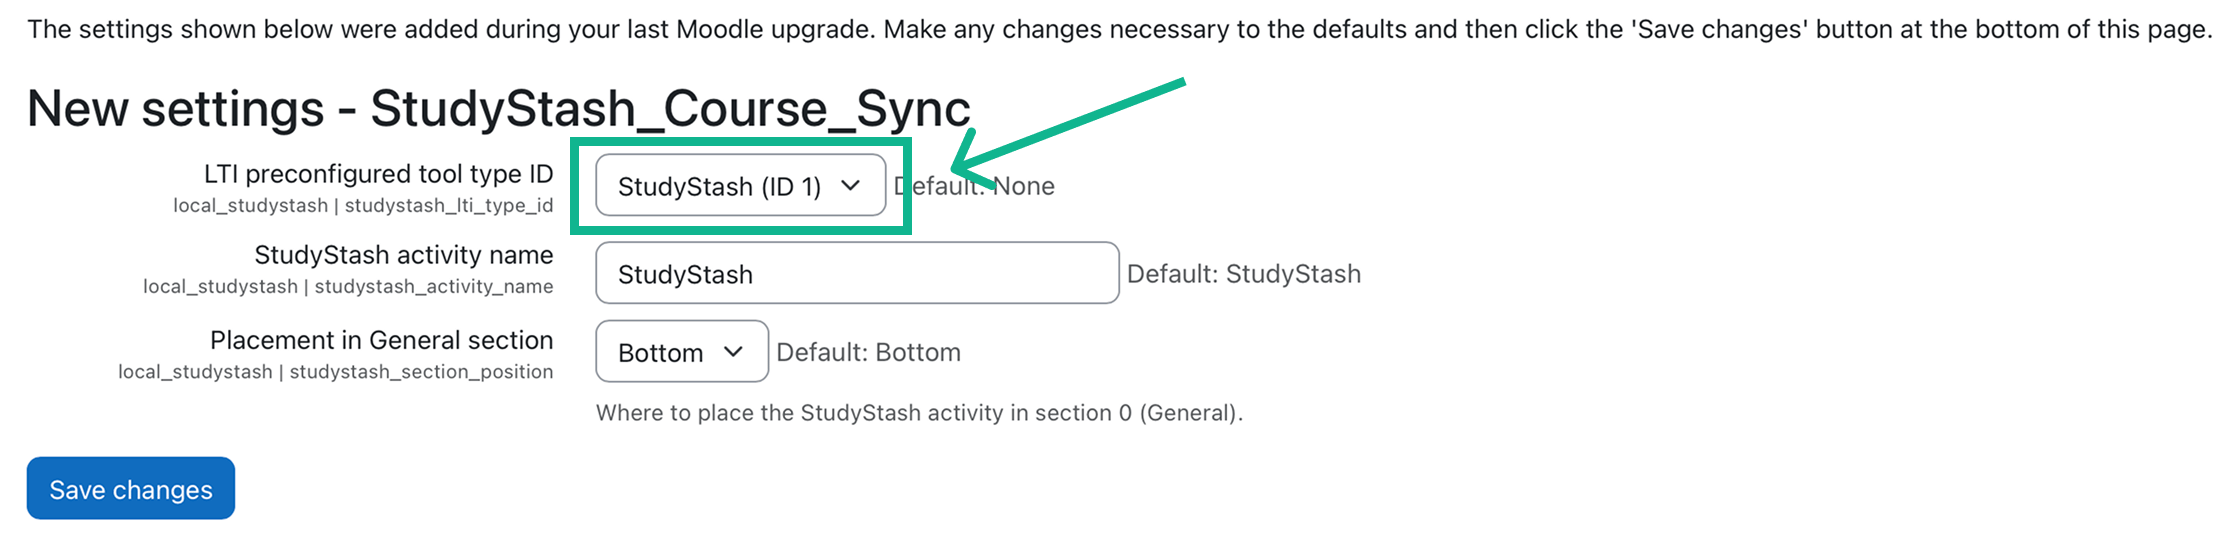
Figure 3. Moodle Plugin: Syncing StudyStash to Courses (Opt-In Mode) — screenshot 3
- Enter the following settings:
Setting | Value | Type |
|---|---|---|
LTI preconfigured tool type ID | Select the correct ‘StudyStash’ LTI Activity Module from the dropdown | Required |
StudyStash activity name | StudyStash | Optional |
Placement in General section | Bottom | Optional |
- Press the “Save changes” button
-
Go to
https://<your-moodle-instance>/local/studystash_optin/index.php
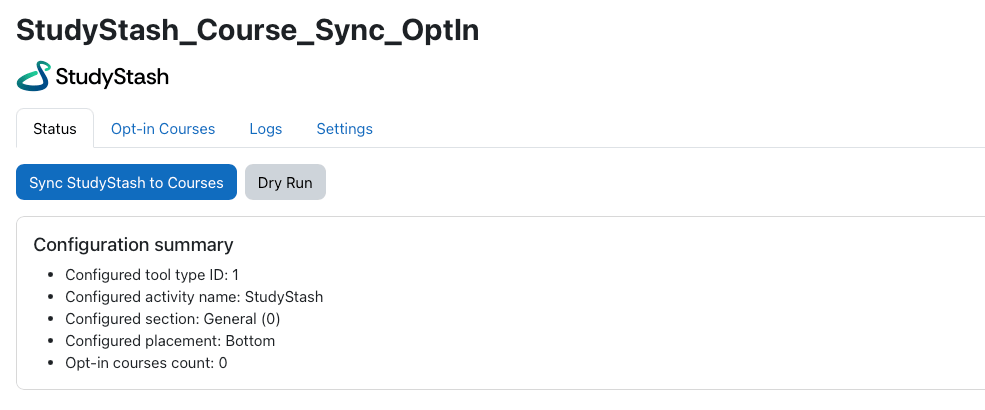
Figure 4. Moodle Plugin: Syncing StudyStash to Courses (Opt-In Mode) — screenshot
-
Press the “Opt-In Courses” tab:
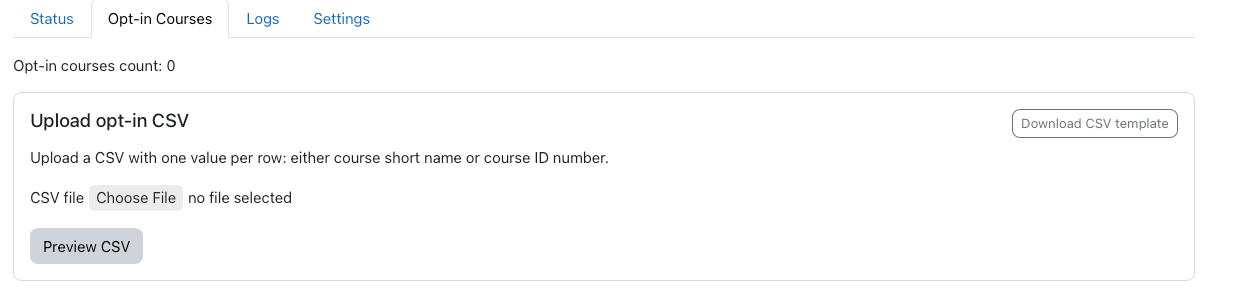
Figure 5. Moodle Plugin: Syncing StudyStash to Courses (Opt-In Mode) — screenshot
-
Press the “Download CSV template” button, and fill out the CSV file.
Each row should either be the Course ID number or the Short name (there is no requirement for a header row). For example: - Upload the CSV file by pressing “Choose File”
- Press “Preview CSV”
-
Ensure all rows within the CSV are valid. For each valid row, the full details will be shown:
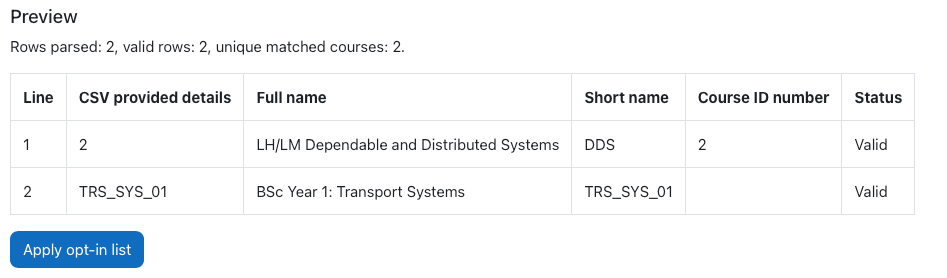
Figure 6. Moodle Plugin: Syncing StudyStash to Courses (Opt-In Mode) — screenshot
- If you are happy with the valid rows, press the “Apply opt-in list” button.
-
Press the “Download CSV template” button, and fill out the CSV file.
-
Optionally, you can Dry Run the sync:
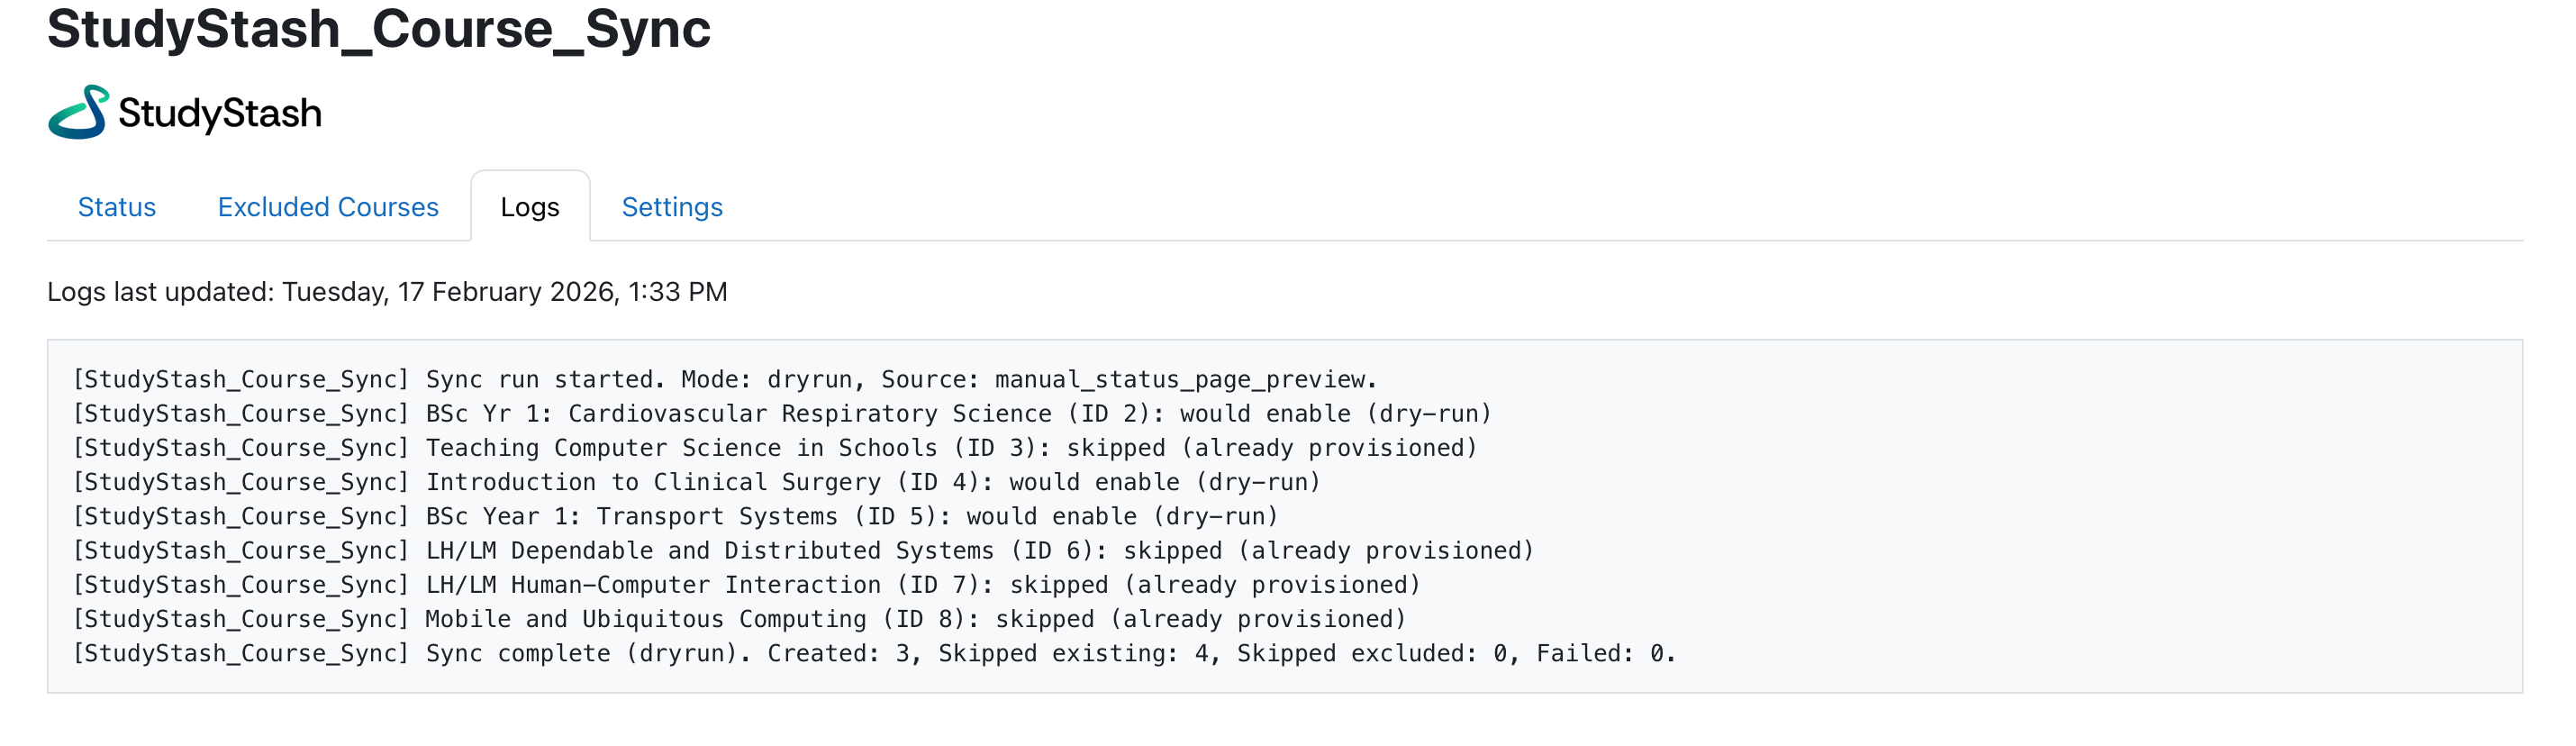
Figure 7. Moodle Plugin: Syncing StudyStash to Courses (Opt-In Mode) — screenshot
- Press “Dry Run”, and wait a few seconds/minutes for the task to complete (depending on how many courses you have)
- Press the “Logs” tab
- Examine logs to ensure behavior is as expected for each course
-
To complete the sync for real, press “Sync StudyStash to Courses” on the “Status” tab:
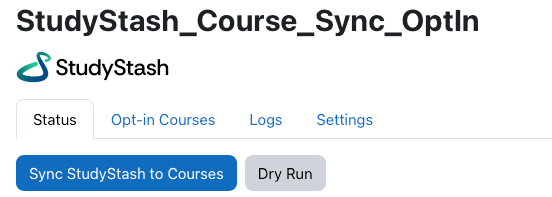
Figure 8. Moodle Plugin: Syncing StudyStash to Courses (Opt-In Mode) — screenshot
FAQs
How can previously opted-in course be deleted? Re-upload the CSV file containing only the courses you still want to keep opted in. Each CSV upload replaces the existing list, so any courses not included in the new file will be removed from the opt-in list. What’s the difference between Course ID and Course ID Number?Course ID | Moodle’s internal, system-generated identifier for a course. It is automatically assigned when the course is created and cannot normally be changed. |
Course ID Number | Optional field set by administrators or course creators. It is often used to match courses with external systems (such as student information systems or integrations) and can be edited if needed. |