

Prerequisites
You must have Moodle administrative access with the ability to manage LTI Advantage tools.Create a new ‘External Tool' in Moodle
- Inside Moodle, navigate to ‘Site administration’ -> ‘Plugins’ → ‘Activity modules’ → ‘External tool’ → ‘Manage tools’
-
Click the ‘Configure a tool manually’ link

Figure 1. Moodle LTI Integration Guide (LTI) — screenshot 1
- Enter the following information in Tool Settings:
Field | Value |
|---|---|
Tool name | StudyStash |
Tool URL | |
Tool description | Safe, AI-Powered Learning, all within your LMS |
LTI Version | LTI 1.3 |
Public key type | Keyset URL |
Public keyset | |
Initiate login URL | |
Redirection URI(s) | |
Tool configuration usage | Show in activity chooser as a preconfigured tool |
Default launch container | Choose from one of the following options:
|
Icon URL | |
Secure icon URL |

- Enter the following information in Services:
Field | Value |
|---|---|
IMS LTI Assignment and Grade Services | Do not use this service |
IMS LTI Names and Role Provisioning | Use this service to retrieve members’ information as per privacy settings |
Tool Settings | Use this service |
- Enter the following information in Privacy:
Field | Value |
|---|---|
Share launcher’s name with tool | Always |
Share launcher’s email with tool | Always |
Accept grades from the tool | As specified in Deep Linking definition or Delegate to teacher |
Force SSL | ✅ Checked |
-
Click the Save button:
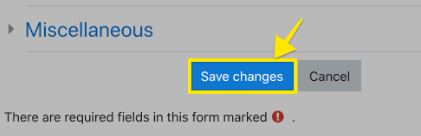
Figure 2. Moodle LTI Integration Guide (LTI) — screenshot
- On the Manage tools page, locate StudyStash and select the View configuration details icon.
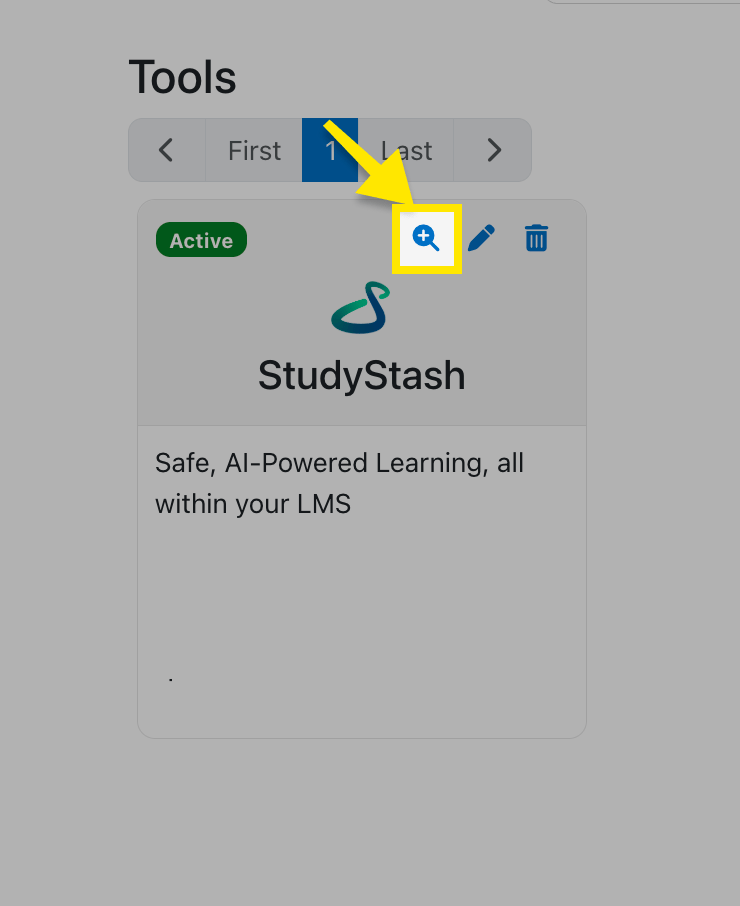
Figure 3. Moodle LTI Integration Guide (LTI) — screenshot
- Copy the Client ID and Deployment ID displayed in the configuration details. You will need both values in Step 2.
Add your Moodle deployment to StudyStash
- Sign in to the StudyStash Admin Dashboard.
- Under Setup, select LMS Integrations, then select Create.
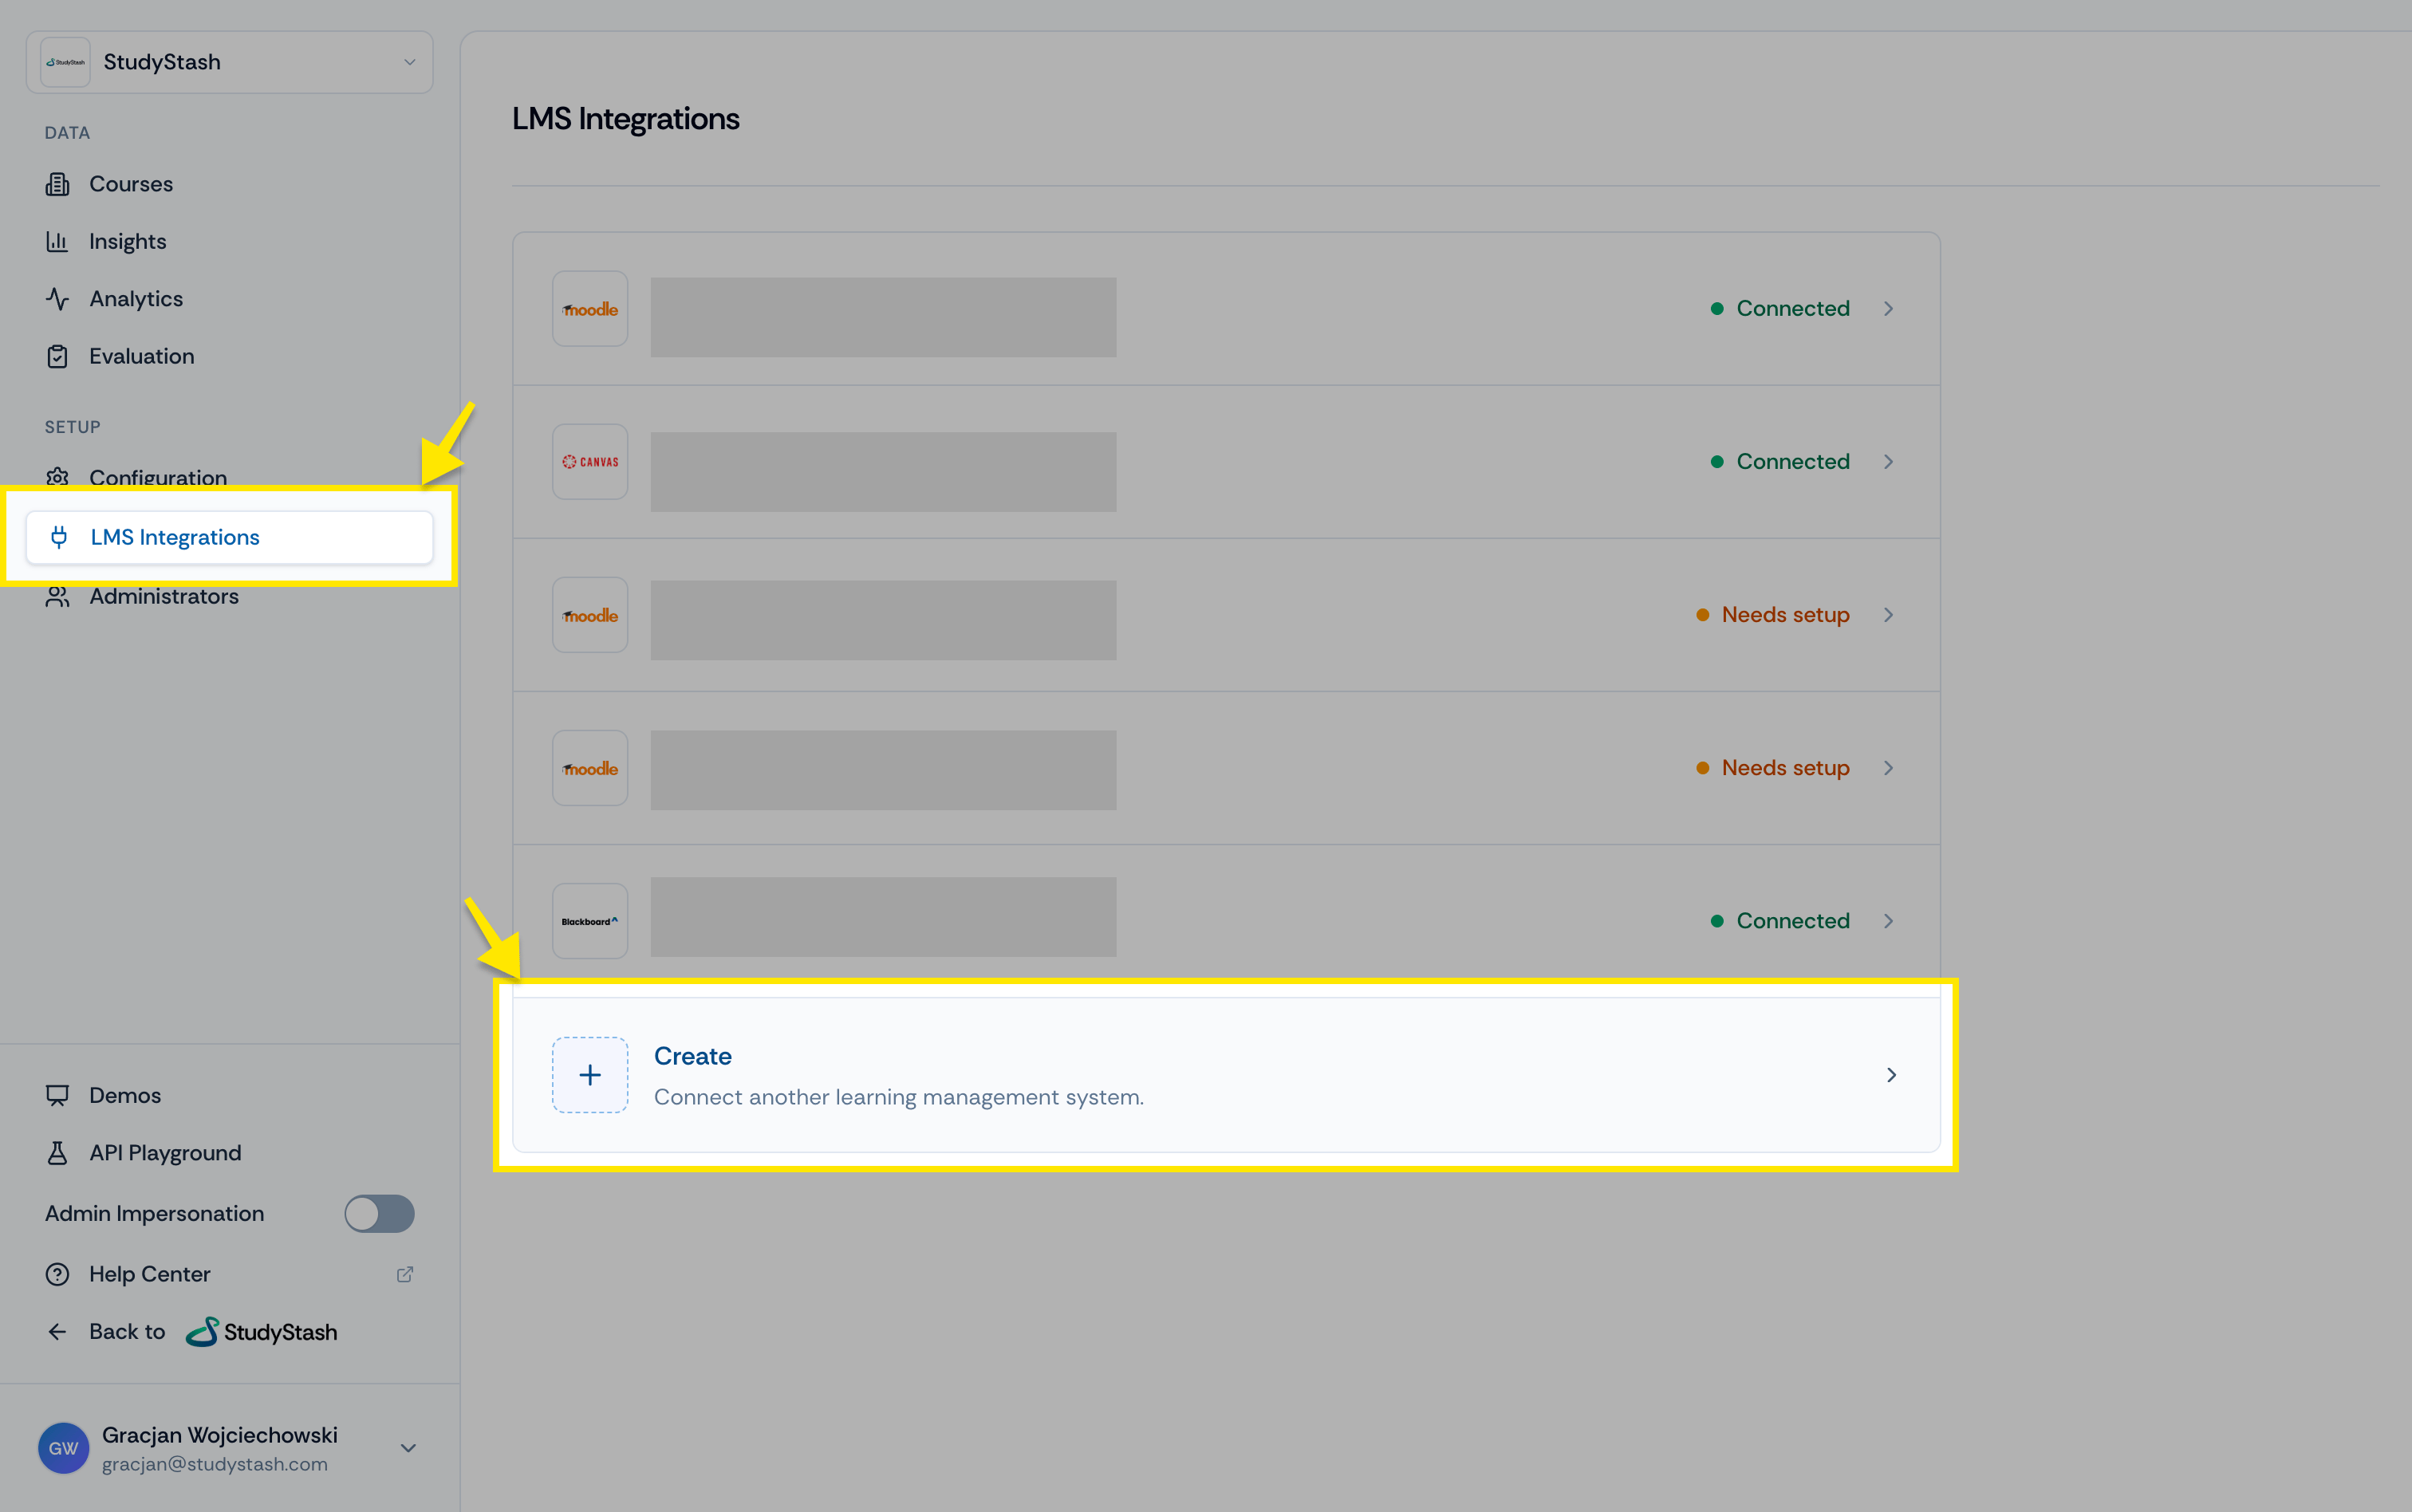
Figure 4. Moodle LTI Integration Guide (LTI) — screenshot
- Select Moodle as the learning management system.
- Enter your institution’s LMS URL, Client ID, and Deployment ID.
- Select Add deployment.
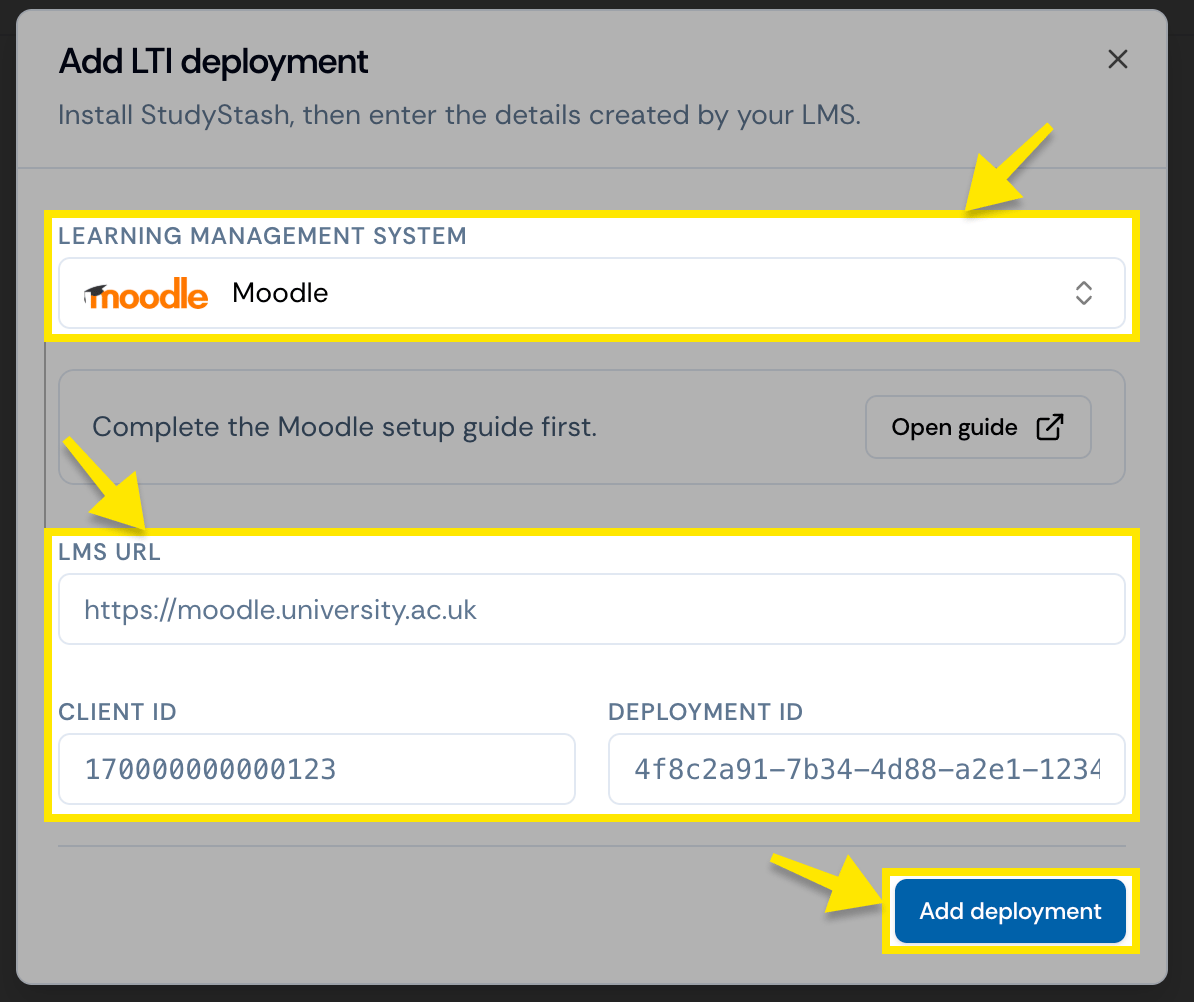
Figure 5. Moodle LTI Integration Guide (LTI) — screenshot
Enable StudyStash to be opened in a new window
- Inside the tool’s settings (as configured in Step 1), locate ‘Default launch container’ and select ‘New window’.
- Tick ‘New window’
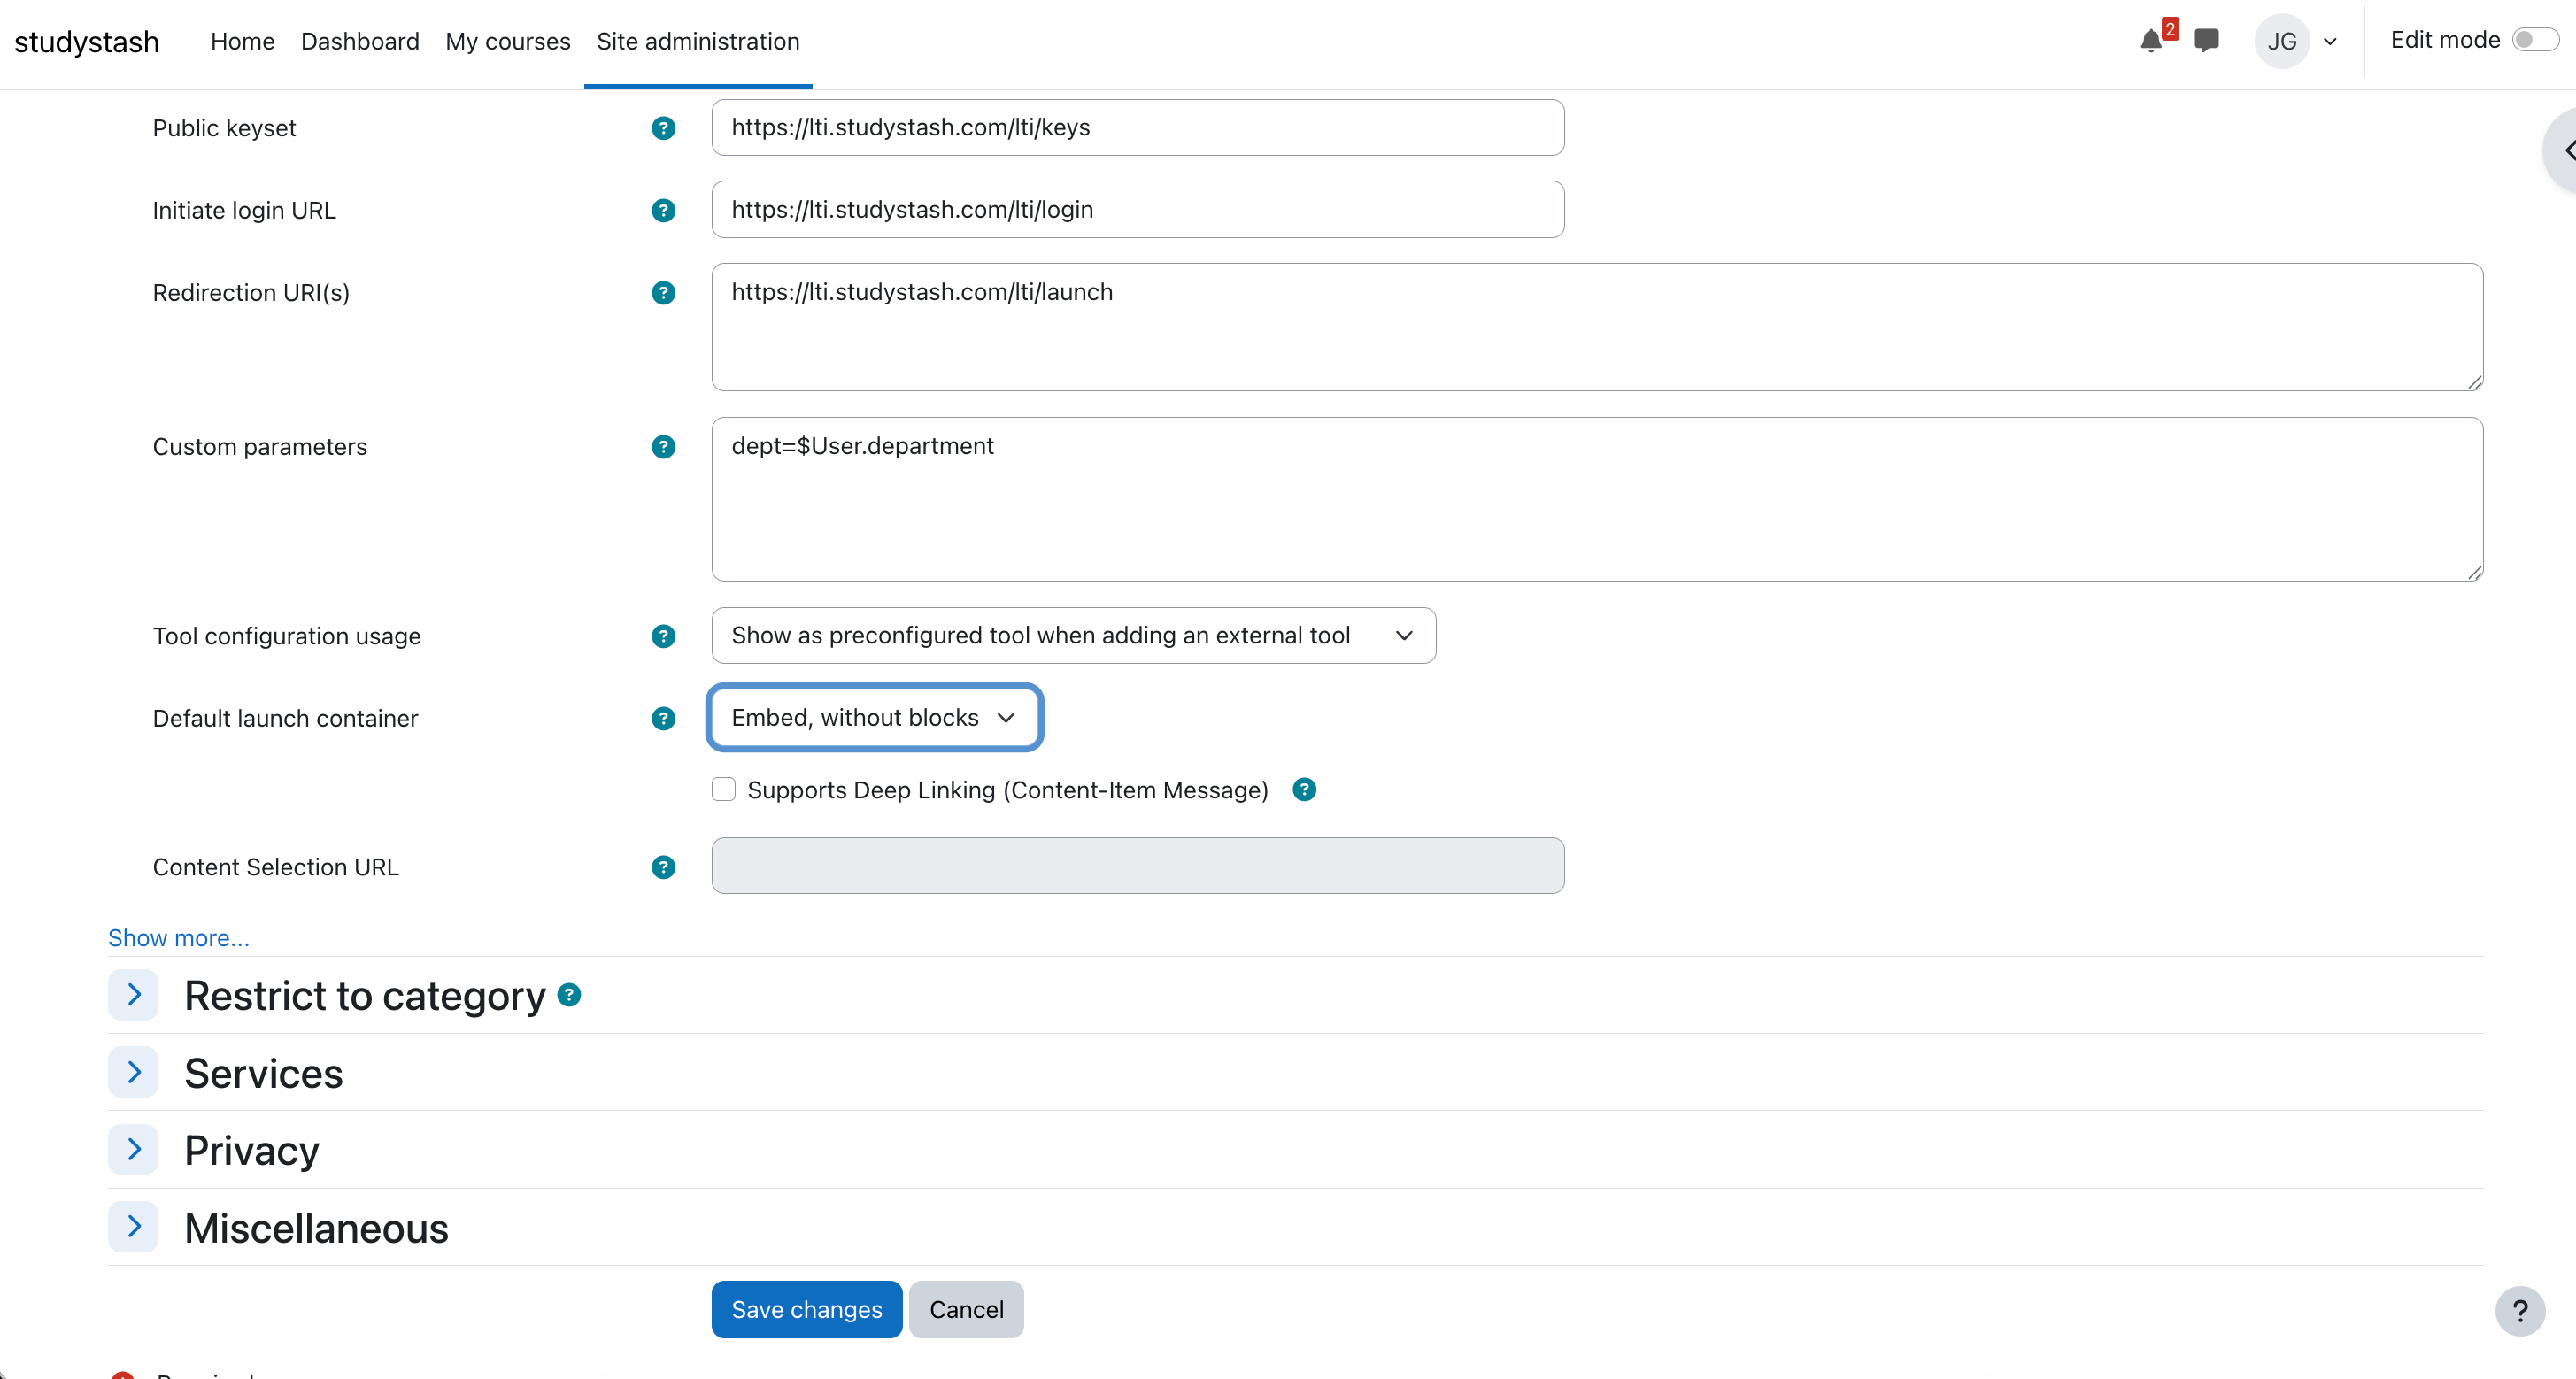
Figure 6. Moodle LTI Integration Guide (LTI) — screenshot

Figure 7. Moodle LTI Integration Guide (LTI) — screenshot
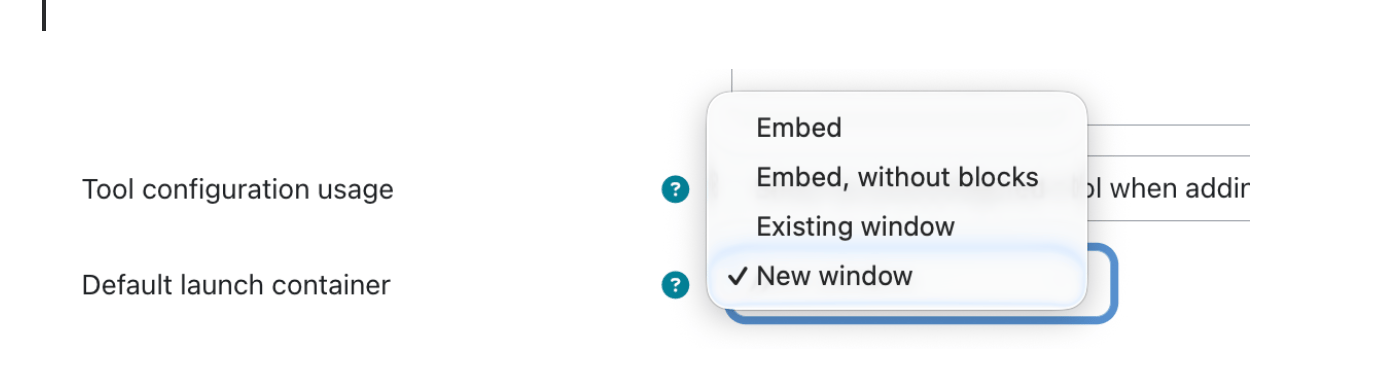
Figure 8. Moodle LTI Integration Guide (LTI) — screenshot