

Prerequisites
You must have Canvas administrative access with Global Developer Key creation permissions.Add a developer LTI® key in Canvas
- Navigate to ‘Admin’ -> ‘Developer Keys’
- Click the ’+ Developer Key’ button followed by the ’+ LTI® Key’ dropdown
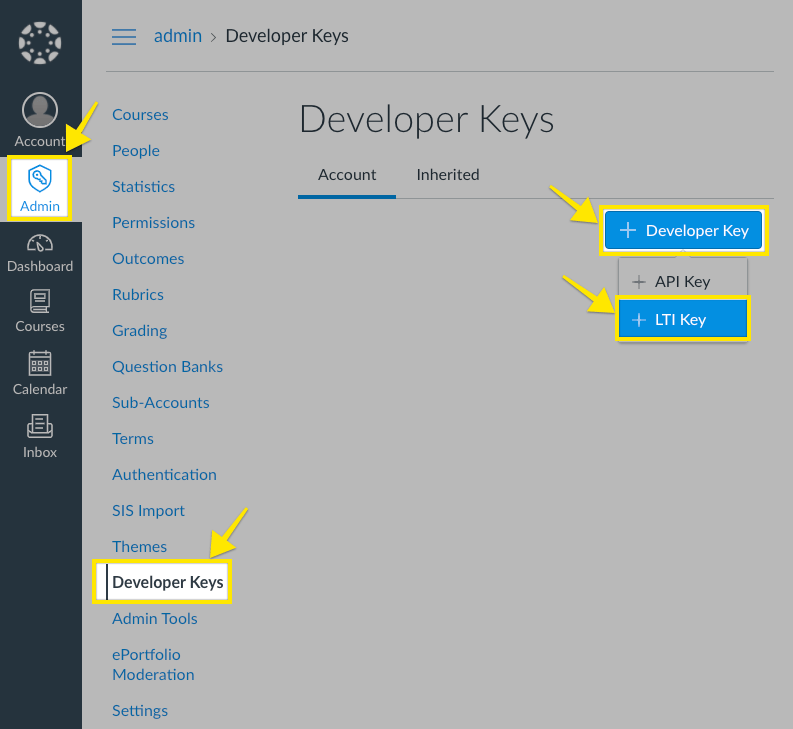
Figure 1. Canvas LTI Integration Guide (LTI) — screenshot
- Enter the following information in Configure:
Field | Value |
|---|---|
Method | Manual Entry |
Key Name | StudyStash |
Title | StudyStash |
Description | Safe, AI-Powered Learning, all within your LMS |
Redirection URI(s) | |
Target Link URI | |
OpenID Connect Initiation Url | |
JWK Method | Public JWK URL |
Public JWK URL |
- Enable the following services in LTI Advantage Services:
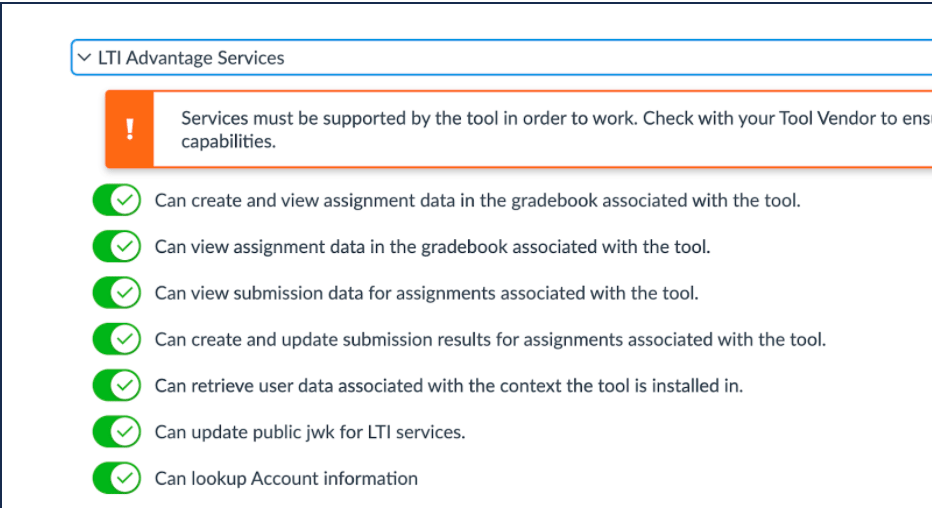
Figure 2. Canvas LTI Integration Guide (LTI) — screenshot
-
Enter the following information in Additional Settings:
- Set Icon Url to https://studystash.com/loop.png
- Set Privacy Level to Public
-
Select Course Navigation in Placements:
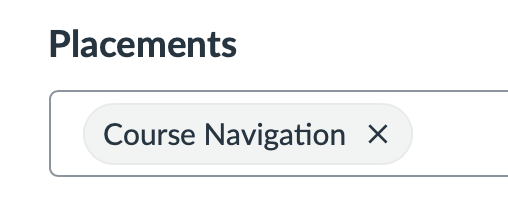
Figure 3. Canvas LTI Integration Guide (LTI) — screenshot
-
Click the Save button:

Figure 4. Canvas LTI Integration Guide (LTI) — screenshot
-
Enable the state of the Developer Key, and take note of the Client ID in the Details column:

Figure 5. Canvas LTI Integration Guide (LTI) — screenshot
Install StudyStash into Canvas
- In the Canvas Admin menu, navigate to ‘Settings’ -> ‘Apps’
-
Click the ’+ App’ button
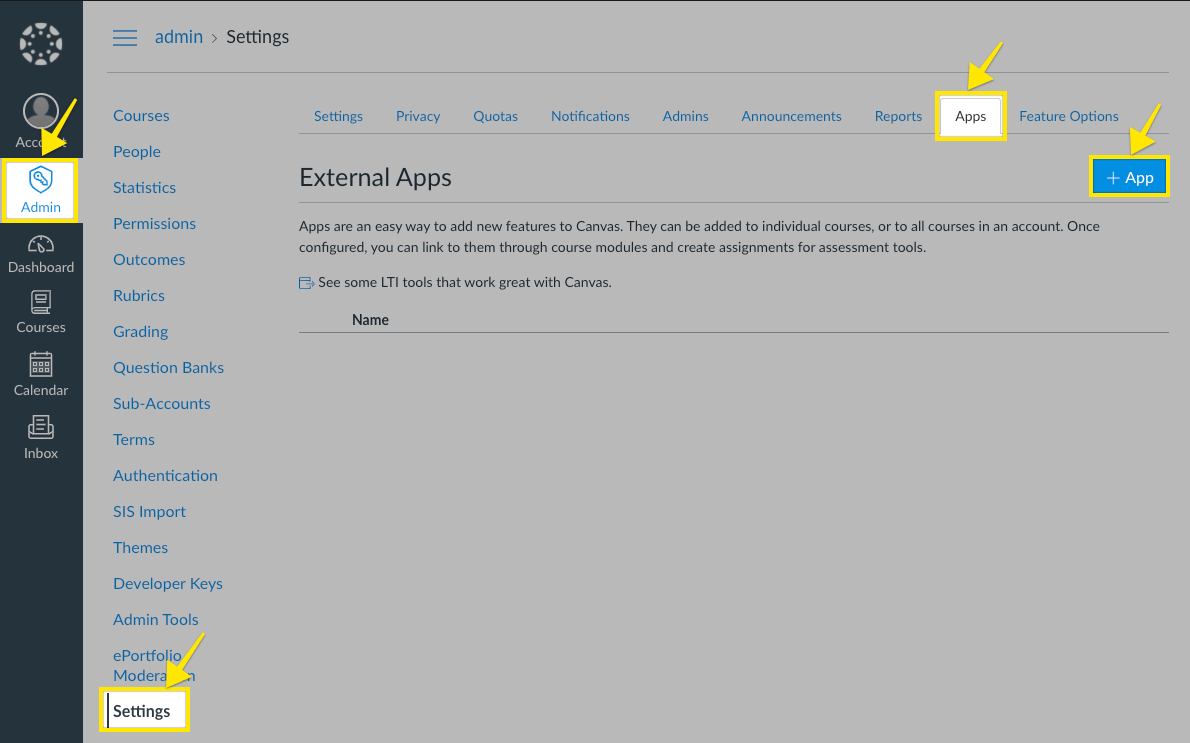
Figure 6. Canvas LTI Integration Guide (LTI) — screenshot
- Enter the following information:
Field | Value |
|---|---|
Configuration Type | By Client ID |
Key Name |
|
- Click Submit
-
In the following dialog, click Install when prompted:
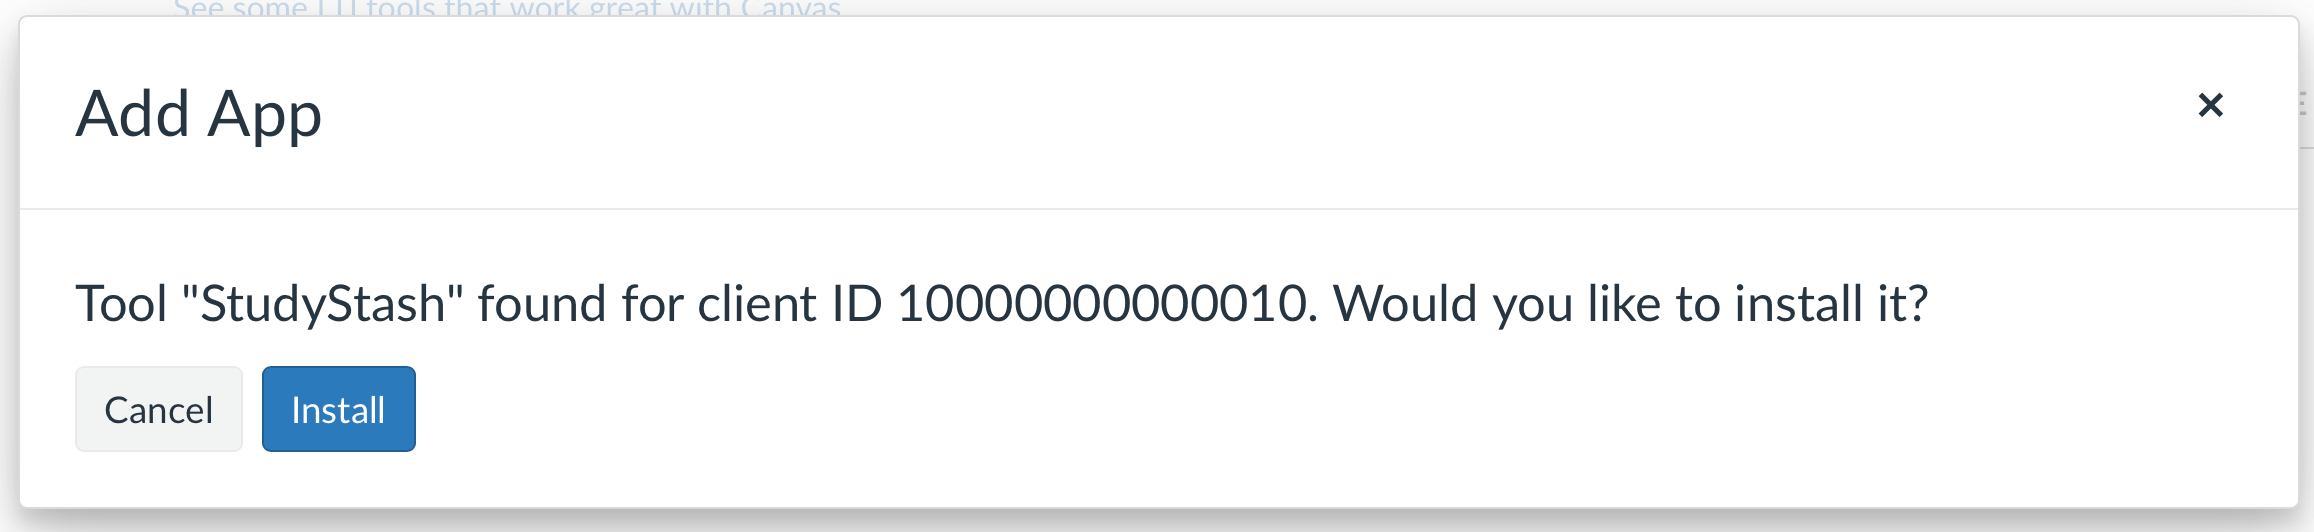
Figure 7. Canvas LTI Integration Guide (LTI) — screenshot
-
On the app row that you’ve just created, open the Settings menu, select Deployment ID, and copy the value. You will need it in Step 3.
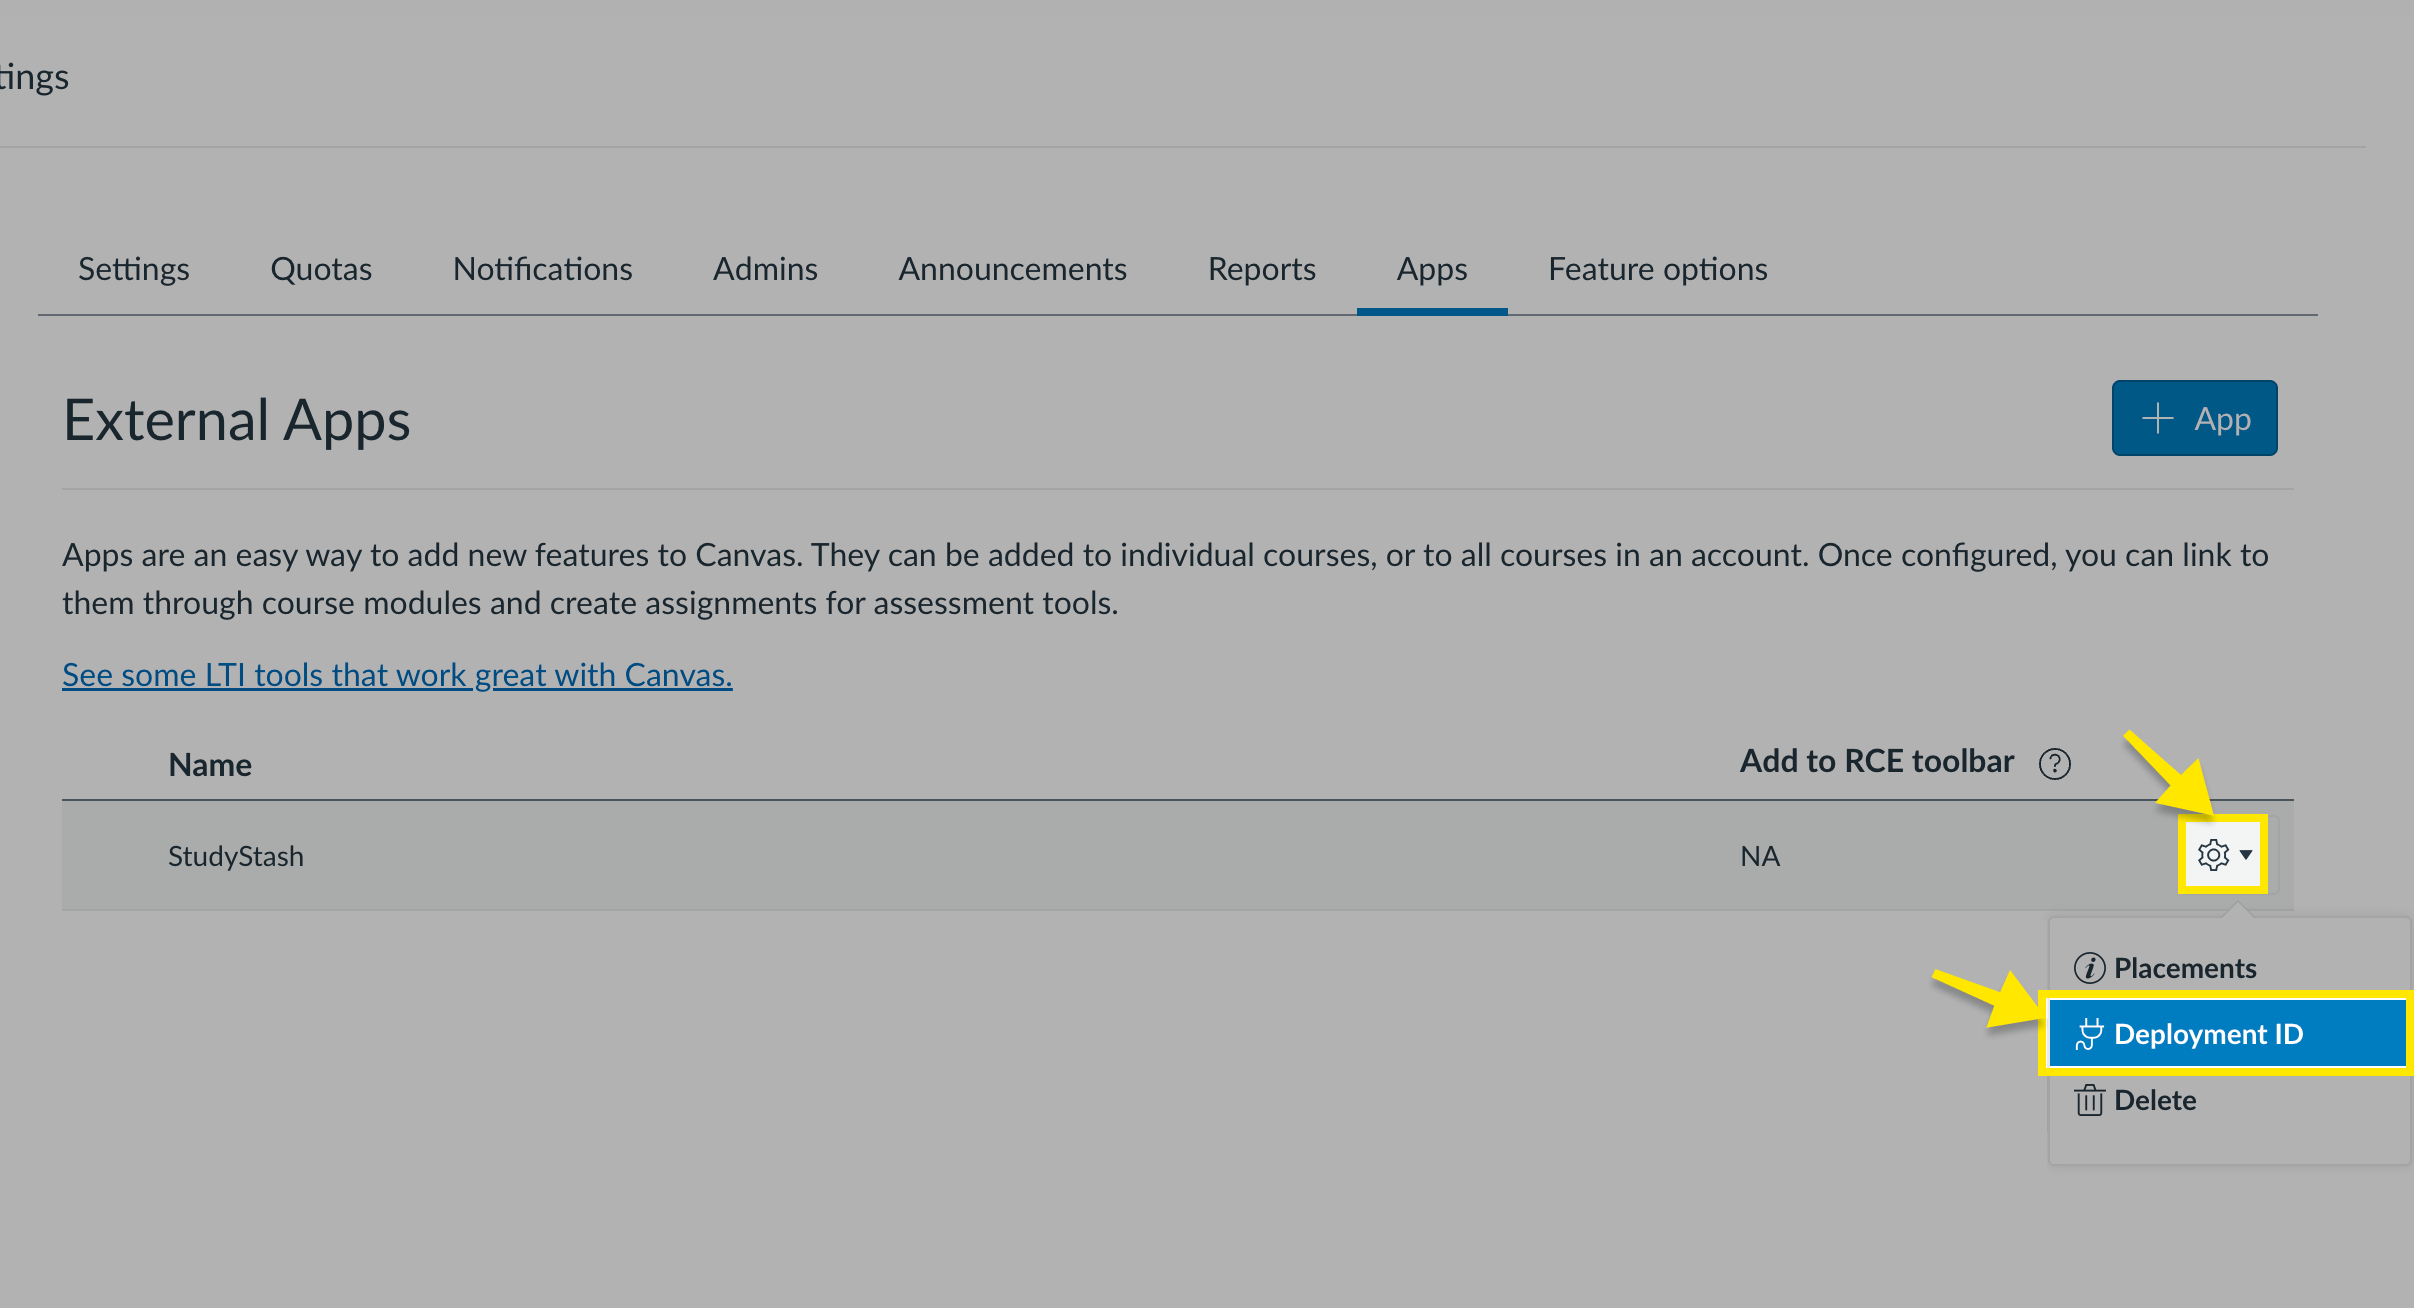
Figure 8. Canvas LTI Integration Guide (LTI) — screenshot
-
Check StudyStash is present in Course Navigation as expected
Add your Canvas deployment to StudyStash
- Sign in to the StudyStash Admin Dashboard.
- Under Setup, select LMS Integrations, then select Create.
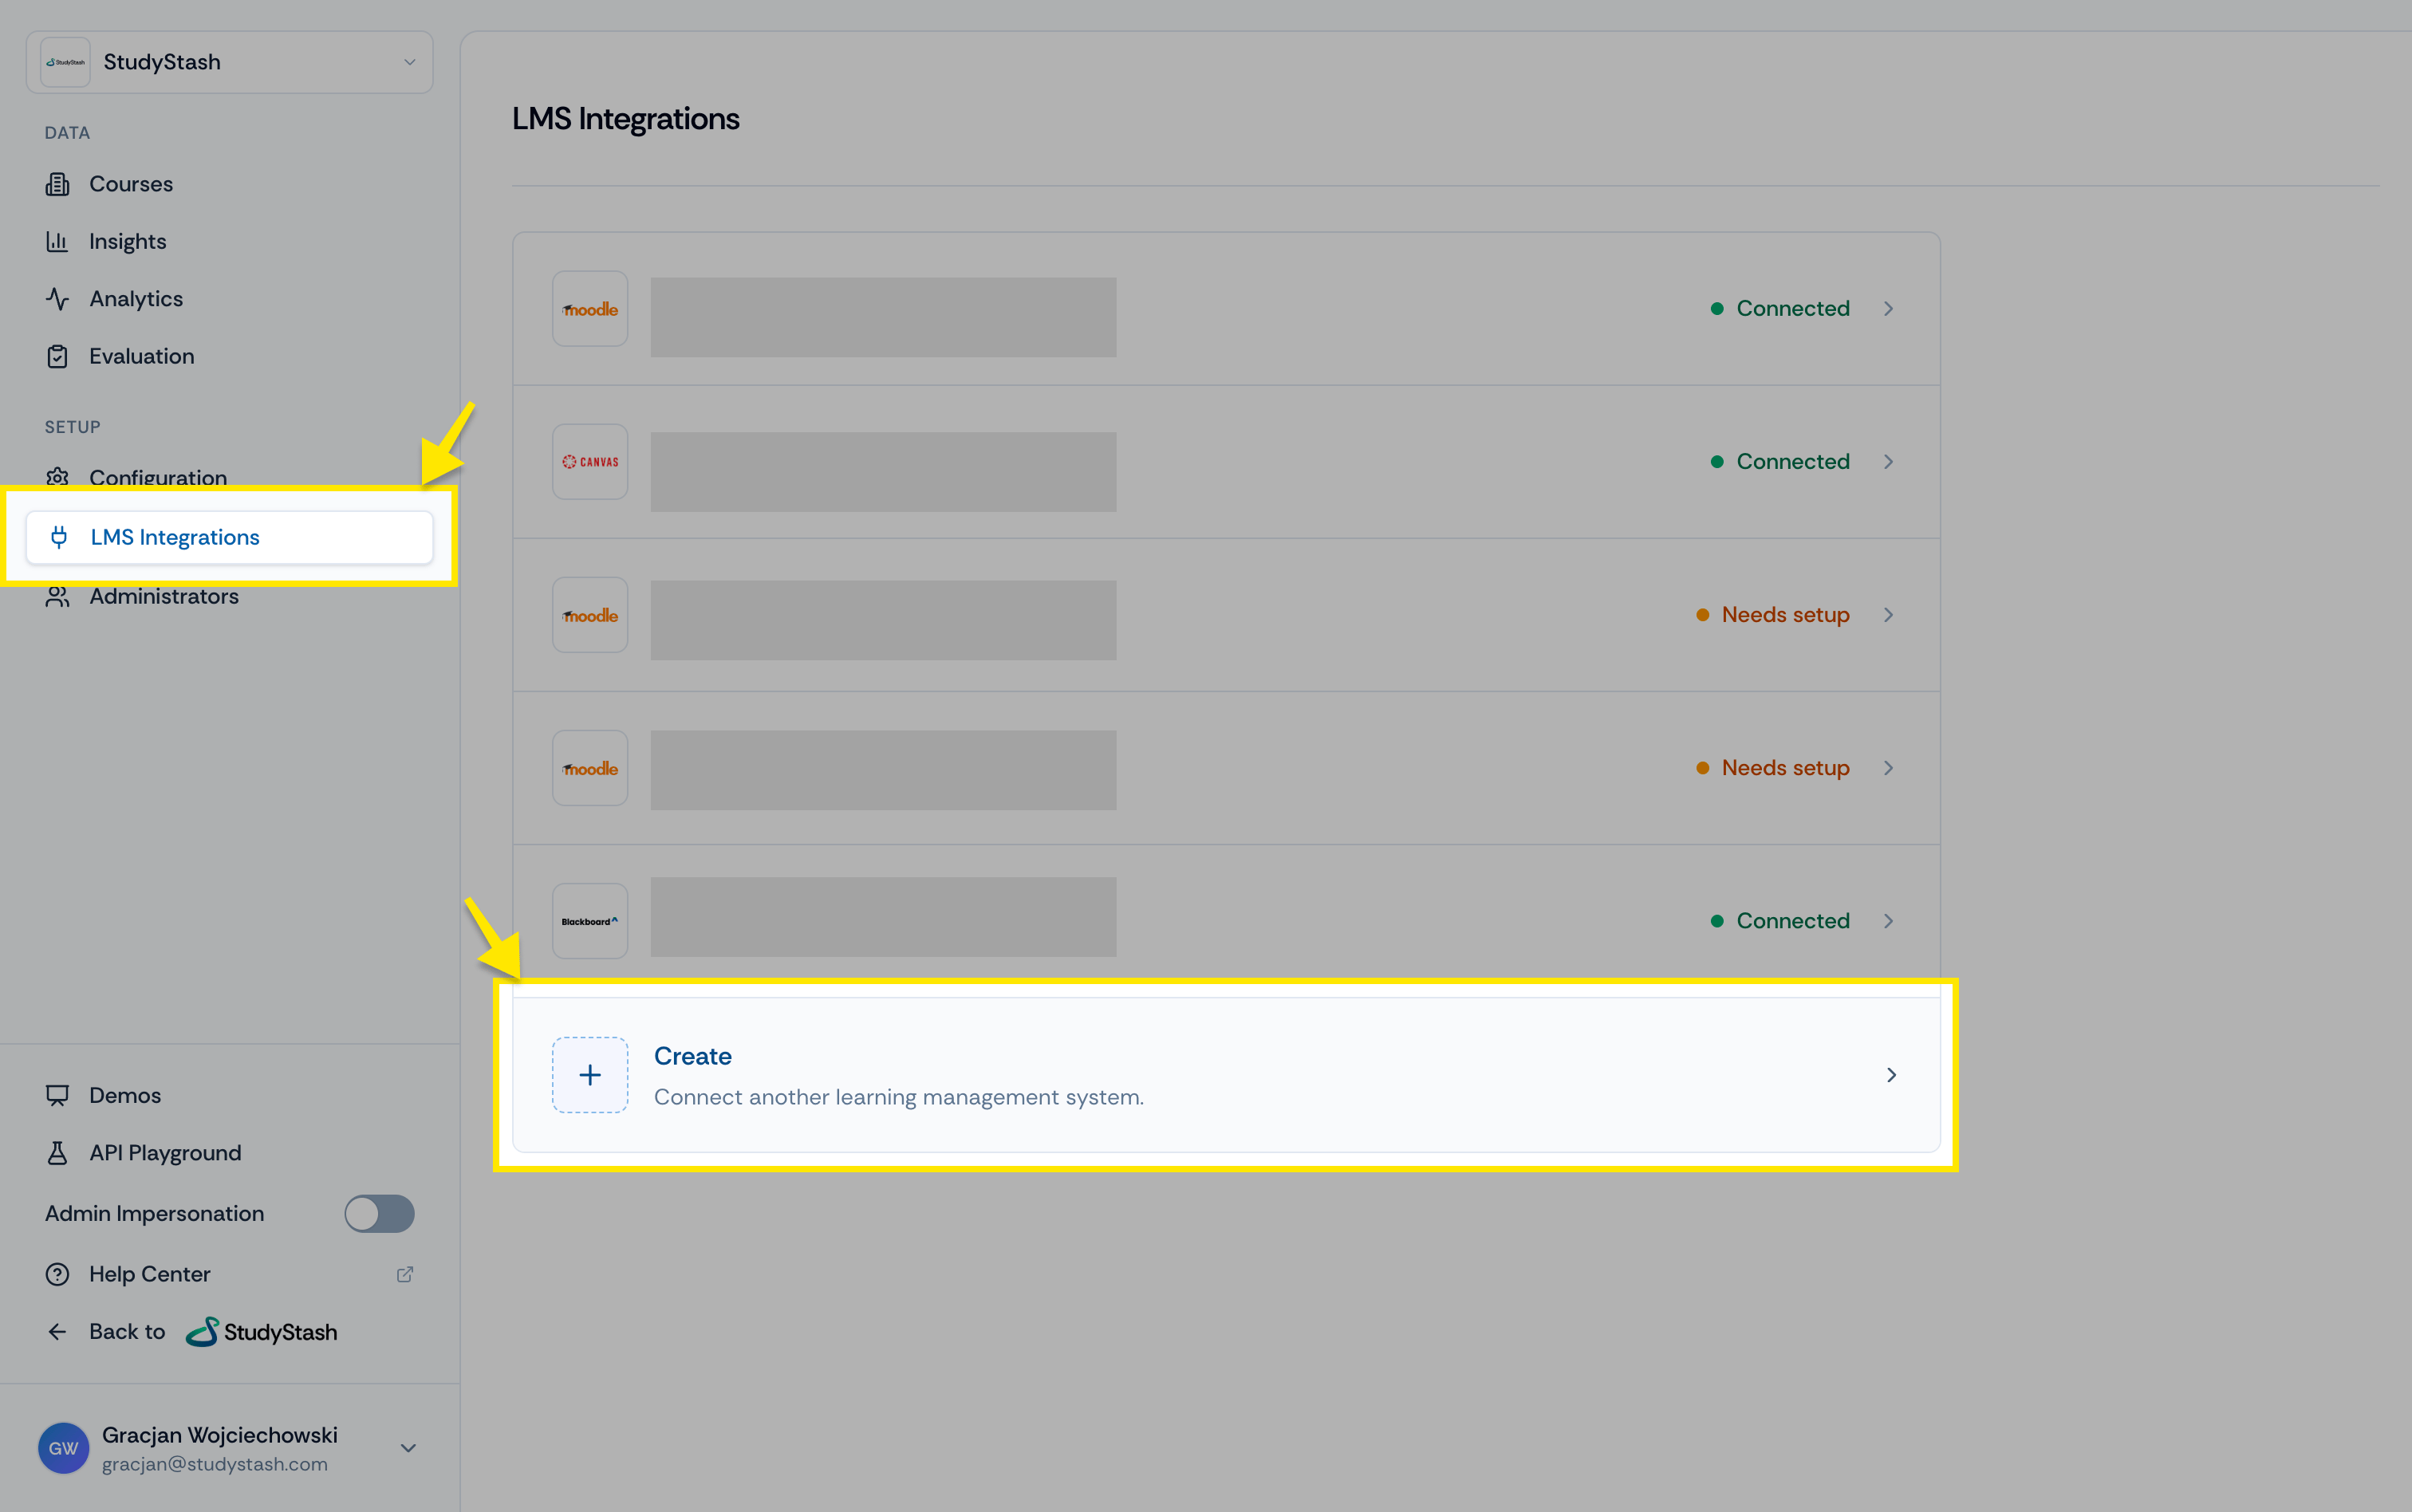
Figure 9. Canvas LTI Integration Guide (LTI) — screenshot
- Select Canvas as the learning management system.
- Enter your institution’s LMS URL, Client ID, and Deployment ID.
- Select Add deployment.
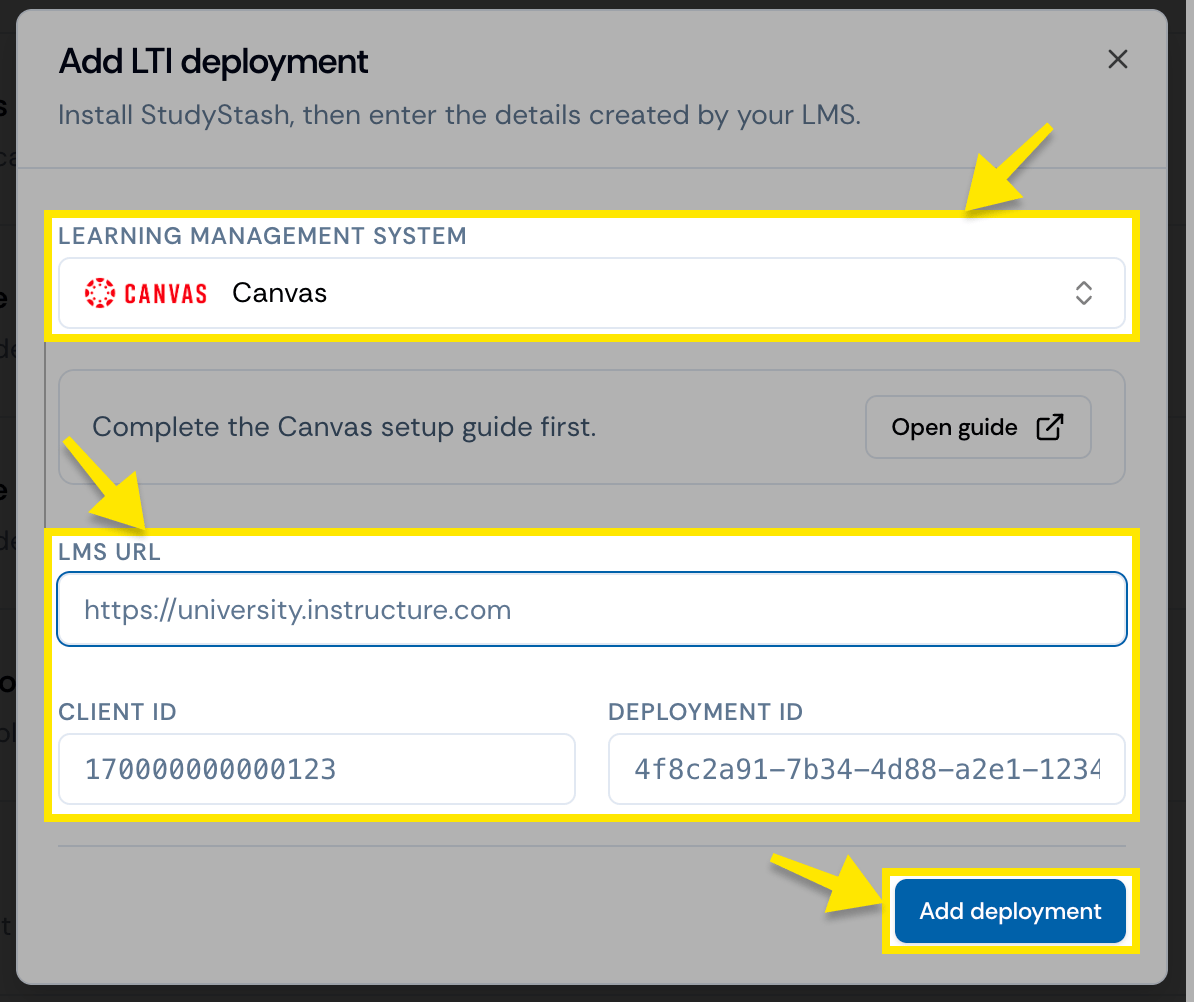
Figure 10. Canvas LTI Integration Guide (LTI) — screenshot